Garlic planting is a rewarding and straightforward process, offering fresh, flavorful harvests․ With proper timing and care, it thrives in various climates, providing a natural pest repellent and delicious results․
Why Grow Garlic?
Growing garlic is a simple yet rewarding endeavor, offering fresh, flavorful harvests and numerous benefits․ It repels pests naturally, improves soil health, and requires minimal care․ Garlic is versatile in cooking and can be stored for months․ Whether you’re a seasoned gardener or a beginner, growing garlic is a great way to enhance your garden and kitchen․ It’s also a low-maintenance crop that thrives in various climates, making it an ideal choice for gardeners of all levels․
Benefits of Homegrown Garlic
Homegrown garlic offers numerous benefits, including fresh, flavorful harvests and natural pest-repelling properties․ It enhances soil health, deters insects, and requires minimal care․ With a long shelf life, homegrown garlic provides year-round convenience․ Plus, it’s resistant to deer, rabbits, and other pests, making it a low-maintenance addition to any garden․ Growing your own garlic also allows for creative uses, like braiding, and ensures a steady supply of this versatile ingredient for cooking and preserving․
Choosing the Right Garlic Variety
Choosing the right garlic variety ensures optimal growth and flavor, with softneck suited for warm climates and hardneck for cold, each offering unique characteristics․
Softneck vs․ Hardneck Garlic
Softneck garlic thrives in warm climates, offering mild flavors and long shelf life, ideal for braiding․ Hardneck garlic, suited for cold climates, provides robust flavors and produces scapes, with varieties like Rocambole and Porcelain․ Each type has unique benefits, so choosing the right one depends on your climate and desired flavor profile․
Elephant Garlic: A Leek Family Member
Elephant garlic, though not a true garlic, belongs to the leek family and resembles giant garlic cloves․ It is mild in flavor, with large, easy-to-peel cloves․ Ideal for roasting or sauces, it grows similarly to regular garlic․ Plant elephant garlic in fall, 2-4 inches deep, spaced 6-8 inches apart․ Its size and mild taste make it a unique addition to gardens, offering a versatile option for culinary use while requiring the same care as traditional garlic varieties․
Best Varieties for Your Climate
Softneck garlic thrives in warm, southern climates, offering mild flavors and long shelf life․ Hardneck garlic is ideal for cold, northern regions, providing robust flavors and durability․ Elephant garlic, a leek family member, grows well in various climates and offers large, mild cloves․ Choose varieties based on your climate to ensure optimal growth and flavor․ Consider factors like storage needs and desired taste to select the best garlic type for your garden, ensuring a successful and flavorful harvest․
Planning and Preparation
Planning and preparation are crucial for a successful garlic harvest․ Assess your needs, determine spacing, and time planting correctly for optimal growth and flavor development․
How Much Garlic to Plant
Planting 1 pound of garlic can yield a 15- to 30-foot row, depending on variety and spacing․ Softneck varieties typically have 65-70 cloves per pound, while hardneck varieties have 40-75․ For intensive planting, stagger rows 6-9 inches apart to maximize space․ Consider ordering extra cloves for interplanting or cooking․ Proper spacing ensures healthy growth and prevents overcrowding, leading to larger, healthier bulbs at harvest time․
Best Time to Plant Garlic
Garlic is best planted in fall, 3-6 weeks before the ground freezes, typically late September to early November․ This allows roots to establish before winter․ In warmer climates, plant by early December․ Avoid planting too early, as this can lead to poor growth and disease․ Hardneck garlic, in particular, needs cold exposure for proper bulb formation․ For colder areas, mulch heavily after planting to protect the soil․ Proper timing ensures a healthy start and a successful harvest․
Understanding Vernalization
Vernalization is the process where garlic requires cold temperatures to form bulbs properly․ This natural dormancy period triggers bulb division, especially in hardneck varieties․ Without vernalization, garlic may not split into cloves, resulting in single-clove rounds․ Fall planting exposes garlic to necessary winter chill, ensuring proper development․ While softneck garlic can grow without vernalization, it may not yield as well․ Proper cold exposure is key for a successful harvest, promoting healthy bulb formation and flavorful results․
Soil Preparation
Garlic thrives in well-draining, rich soil․ Amend clay soil with compost or fertilizer for better structure․ Ensure full sun and optimal conditions for healthy root development and bulb formation․
Optimal Soil Conditions
Garlic thrives in well-draining, rich soil with a pH between 6․0 and 7․0․ It prefers full sun and soil amended with compost or fertilizer to enhance structure and fertility․ For clay soils, adding 2-3 inches of compost loosens the ground and improves drainage․ Avoid waterlogged areas, as garlic is susceptible to rot․ Proper soil preparation ensures healthy root development and promotes flavorful, large bulbs; Optimal conditions also reduce the risk of diseases like rust, ensuring a successful harvest․
Amending the Soil
Amending the soil is crucial for optimal garlic growth․ Add 2-3 inches of aged compost or organic fertilizer to improve soil structure and fertility․ For enhanced results, mix in worm castings or a granular vegetable fertilizer․ This enriches the soil with essential nutrients and promotes healthy root development․ In clay-heavy soils, compost helps loosen the ground, improving drainage and aeration․ Properly amended soil supports robust plant growth, flavorful bulbs, and better resistance to diseases like rust, ensuring a successful garlic harvest․
Testing Your Soil
Testing your soil is essential to ensure optimal conditions for garlic growth․ Check the pH level, aiming for a range of 6․0 to 7․0, as garlic thrives in slightly acidic to neutral soil․ Use a DIY soil testing kit or send a sample to a professional lab for detailed analysis․ This helps identify nutrient deficiencies and guides amendments like compost or fertilizers․ Proper soil testing prevents over-fertilization and ensures a balanced environment, promoting healthy root development and robust bulb formation for a successful harvest․
The Planting Process
Plant garlic cloves 2-3 inches deep, spaced 4-6 inches apart, typically in fall, allowing roots to establish before winter for optimal spring growth and bulb formation․
Preparing Garlic Cloves
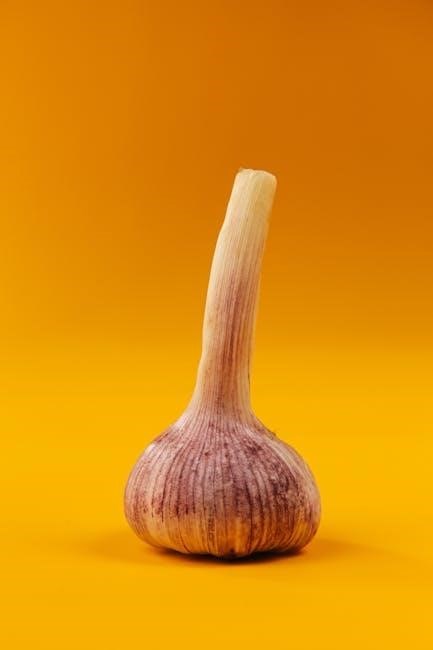
Break garlic bulbs into individual cloves, selecting firm, plump ones for planting․ Small cloves may not yield large bulbs, so they’re better suited for kitchen use․ Ensure each clove retains its papery wrapper, as this protects it during growth․ Avoid damaged or rotting cloves, as they can lead to poor germination or disease․ Properly prepared cloves ensure healthy root development and robust growth, setting the foundation for a successful harvest․
Digging Trenches
Dig trenches 2 to 4 inches deep, depending on your climate—shallower in warmer areas and deeper in colder regions․ This depth allows roots to establish before winter․ Use a garden fork to loosen the soil at the bottom without overturning it, ensuring good drainage and aeration․ Proper trench preparation promotes healthy root growth and protects cloves from extreme temperatures, setting the stage for a strong start when spring arrives․
Spacing and Depth
Plant garlic cloves 4 to 6 inches apart, with rows spaced 6 to 9 inches apart․ In colder climates, plant cloves 4 inches deep, while in warmer areas, 2 inches is sufficient․ Proper spacing ensures good air circulation, reducing the risk of fungal diseases like rust․ For humid climates, increase spacing to 6 inches between cloves and 9 to 12 inches between rows to enhance airflow․ Depth and spacing adjustments help optimize growth and prevent moisture-related issues․
Mulching After Planting
Mulching after planting garlic is essential for retaining moisture, suppressing weeds, and regulating soil temperature․ Apply 3 to 6 inches of organic mulch like straw, pine needles, or wood chips․ In colder climates, thicker mulch layers protect the soil from freezing, while warmer climates may need less to avoid overheating․ Replenish mulch after the first frost for added protection․ This practice prevents rot and ensures garlic develops strong roots before winter, promoting healthy growth and a successful harvest․
Care and Maintenance
Garlic requires consistent moisture, proper fertilization, and protection from pests․ Use organic mulch to retain moisture and suppress weeds, ensuring healthy growth and a robust harvest․
Watering Tips
Garlic needs consistent moisture but avoids waterlogging․ Keep the top 2 inches of soil moist, using drip irrigation if possible․ Avoid overwatering, especially in cooler months, to prevent rot․ In spring, water deeply but infrequently to promote healthy growth․ Mulch helps retain moisture and regulate soil temperature․ Ensure water reaches the root zone, keeping leaves dry to minimize disease risks like garlic rust․ Adjust watering based on climate, with drier regions needing more careful management․
Fertilization
Fertilization is key for robust garlic growth․ Apply a balanced, organic fertilizer like compost or alfalfa meal in early spring when green shoots emerge․ Side-dress with a granular vegetable fertilizer for a nitrogen boost․ Avoid over-fertilizing, as it can reduce bulb quality․ Compost or well-rotted manure enriches the soil naturally․ Worm castings can be added under each clove for extra nutrients․ Proper fertilization promotes healthy foliage and bulb development, ensuring a bountiful harvest․
Pest and Disease Control
Garlic is relatively pest- and disease-free but can be susceptible to issues like garlic rust, aphids, and fungal diseases․ Regularly inspect plants and remove infected areas․ Use neem oil or insecticidal soap to control pests․ Copper-based fungicides can treat fungal infections․ Rotate crops annually to prevent disease buildup․ Companion planting with herbs like marjoram or chamomile deters pests naturally․ Maintain good air circulation by proper spacing to reduce moisture-related diseases․ Healthy soil and proper watering practices also help prevent common garlic ailments․
Common Challenges
Garlic planting can face challenges like garlic rust, pests, and improper timing․ Ensuring proper soil preparation and care helps mitigate these issues for a successful harvest․
Dealing with Garlic Rust
Garlic rust, a fungal disease, causes yellow spots on leaves that turn black, damaging plants․ Improve air circulation by increasing spacing and using mulch․ Avoid overhead watering and remove infected leaves․ Treat with organic fungicides if necessary․ Prevention is key, as rust can significantly reduce yields․ Regular monitoring and proper planting techniques help minimize its impact, ensuring healthy growth and a successful harvest․
Managing Pests
Garlic naturally repels pests like aphids, weevils, and Japanese beetles due to its pungency․ It also resists deer, rabbits, and moles, making it a low-maintenance crop․ Interplanting garlic with other vegetables deters pests, while its strong scent protects neighboring plants․ Regularly inspect plants for signs of infestation and use organic methods to control pests․ Garlic’s natural defense mechanisms make it an excellent addition to any garden, promoting a balanced and pest-free ecosystem․
Growth Stages
Garlic progresses through distinct growth stages, from fall planting and winter rooting to spring green shoots and summer bulb formation, requiring cold exposure for proper development․
Understanding Garlic Development
Garlic development follows a clear life cycle, starting with fall planting, where cloves root over winter; In spring, green shoots emerge, and plants grow until maturity․ Hardneck varieties form scapes, which signal bulb development․ Proper cold exposure (vernalization) is crucial for bulb formation, especially in hardneck garlic․ As leaves yellow, the plant signals readiness for harvest, ensuring flavorful, well-formed bulbs․ Understanding these stages helps gardeners optimize care and timing for a successful crop․
Managing Garlic Scapes
Garlic scapes, the curly flower stalks on hardneck varieties, should be removed once they form one full curl․ This process, called “topping,” redirects the plant’s energy to bulb development, resulting in larger, more flavorful cloves․ Scapes are edible and can be used in cooking, adding a delicious bonus to your harvest․ Regularly inspect plants in late spring to early summer and trim scapes promptly to optimize growth and ensure a bountiful yield․
Harvesting Garlic
Garlic is ready to harvest when about 50% of the leaves turn brown․ Carefully dig around the bulbs with a fork, avoiding damage to ensure optimal flavor and storage․
Signs of Readiness
Garlic is ready to harvest when about 50% of the leaves turn brown, indicating the bulbs are fully mature․ Check individual plants by gently digging around them with a fork․ For hardneck varieties, harvest 4-6 weeks after scapes appear․ Softneck garlic is ready when the lower leaves yellow, and the top half remains green․ Avoid waiting until all leaves die, as this can reduce storage quality․ Proper timing ensures flavorful, well-wrapped bulbs for long-lasting use․
Proper Harvesting Techniques
Harvest garlic when 50% of the leaves are brown, signaling mature bulbs․ Use a fork to gently dig around plants, avoiding damage․ For hardneck varieties, harvest 4-6 weeks after scapes appear․ Softneck garlic is ready when lower leaves yellow․ Carefully lift bulbs, taking care not to bruise them․ Handle with gloves to prevent skin irritation․ Harvest in dry weather to ensure bulbs are dry and ready for curing․ Proper technique ensures high-quality, long-lasting garlic for storage and use․
Post-Harvest Care
Proper curing and storage are crucial for preserving garlic․ Dry bulbs thoroughly in a cool, well-ventilated area to prevent spoilage․ Store in airtight containers for long-term freshness․
Curing Garlic
Curing garlic is essential for long-term storage․ After harvesting, spread bulbs in a single layer in a cool, well-ventilated area, away from direct sunlight․ Allow 2-4 weeks for the outer skin to dry completely, forming a protective barrier․ Proper curing prevents spoilage and ensures flavorful bulbs․ Store cured garlic in airtight containers or paper bags to maintain freshness․ This step is crucial for preserving your harvest and enjoying homegrown garlic year-round․
Storage Tips
Store cured garlic in a cool, dark, dry place to maintain flavor and texture․ Use airtight containers or paper bags to keep moisture out․ Avoid refrigeration, as it can cause mold․ Softneck varieties store longer (6-12 months) than hardneck (4-6 months)․ Ensure good ventilation to prevent spoilage․ For extended storage, keep bulbs whole and unbroken․ Properly stored garlic retains its aroma and flavor, ready for year-round use in your kitchen․
Using Garlic in Your Garden
Garlic naturally repels pests like aphids, weevils, and Japanese beetles, protecting your garden․ It can also be grown as a perennial, adding versatility to your planting strategy․
Garlic as a Natural Pest Repellent
Garlic’s pungency deters pests like aphids, weevils, mosquitoes, mites, and Japanese beetles․ Interplanting garlic with vegetables repels these pests naturally․ It also resists deer, rabbits, and moles, reducing garden damage․ Additionally, garlic can be grown as a perennial, making it a versatile and low-maintenance option for pest control․ Use excess cloves to create a protective barrier around your garden, ensuring a healthier and more productive growing environment without harmful chemicals․
Companion Planting
Garlic enhances garden health through companion planting, benefiting vegetables like tomatoes, peppers, and roses by repelling pests and improving flavor․ Planting garlic near cabbage, carrots, and beetroot deters aphids and other pests, promoting healthier growth․ It also pairs well with herbs like mint and basil, creating a balanced ecosystem․ Avoid planting garlic near beans and asparagus, as it can hinder their growth․ Strategic companion planting with garlic boosts crop productivity and garden diversity naturally․
Garlic planting is a simple, rewarding process offering fresh flavors and long-term benefits․ Start today and enjoy a bountiful harvest with minimal effort and lasting rewards․
Final Tips for Success
For a successful garlic harvest, ensure proper timing, as planting too early can lead to poor growth․ Use well-draining soil enriched with compost for optimal results․ Water deeply but avoid overwatering, especially in cooler months․ Mulch heavily in colder climates to protect roots․ Monitor for pests and diseases like rust, and remove scapes from hardneck varieties to direct energy to bulb growth․ Check for harvest readiness when 50% of leaves are brown, ensuring flavorful, long-storing bulbs․
Encouragement to Start Planting
Garlic is one of the easiest and most rewarding crops to grow, making it perfect for gardeners of all skill levels․ Its cold hardiness and versatility in various climates ensure a successful harvest․ Plus, it naturally repels pests, benefiting your entire garden․ With minimal effort, you can enjoy fresh, flavorful garlic year-round․ Don’t hesitate—start planting today and discover the joy of homegrown garlic while enhancing your garden’s health and productivity!