The Honeywell T4 Pro Installation Manual is a comprehensive guide designed to help users seamlessly install‚ program‚ and troubleshoot their thermostat. With clear‚ step-by-step instructions and detailed wiring diagrams‚ it ensures a smooth setup process for optimal performance.
1.1 Overview of the Honeywell T4 Pro Thermostat
The Honeywell T4 Pro Thermostat is a programmable‚ user-friendly device designed for efficient temperature control. It offers features like programmable scheduling‚ automatic system changeover‚ and fan control. Compatible with various HVAC systems‚ including heat pumps‚ it ensures optimal performance. The thermostat learns your system’s behavior to pre-heat or cool‚ maintaining comfort. With a simple interface and advanced options‚ it balances ease of use with powerful functionality‚ making it ideal for both residential and light commercial settings.
1.2 Importance of Proper Installation
Proper installation of the Honeywell T4 Pro Thermostat is crucial for ensuring optimal functionality‚ efficiency‚ and safety. Incorrect wiring or setup can lead to system damage‚ safety hazards‚ or poor performance. Following the manual’s guidelines guarantees correct configuration‚ preventing potential issues. Proper installation also ensures energy savings and reliable operation. Always refer to the manual or consult a professional if unsure to avoid risks and maintain warranty validity.
Package Contents
The Honeywell T4 Pro package includes the thermostat‚ UWP mounting system‚ installation adapter‚ decorative cover plate‚ screws‚ 2 AA batteries‚ and instructions. Optional cover plate available.
2.1 Items Included in the Box
The Honeywell T4 Pro package includes the T4 Pro Thermostat‚ UWP mounting system‚ Honeywell standard installation adapter (J-box adapter)‚ decorative cover plate‚ screws‚ anchors‚ 2 AA batteries‚ and installation instructions. An optional decorative cover plate is also available for enhanced aesthetics. These components ensure a complete and straightforward installation process‚ providing everything needed to set up your thermostat efficiently.
2.2 Optional Accessories
Optional accessories for the Honeywell T4 Pro include additional decorative cover plates in various sizes to match your home decor. These plates are designed to fit seamlessly with the thermostat’s mounting system‚ offering a sleek and personalized appearance. While not essential for functionality‚ they enhance the thermostat’s visual appeal‚ allowing users to customize their setup according to their interior design preferences.
System Compatibility
The Honeywell T4 Pro thermostat is compatible with most HVAC systems‚ including heat pumps and single or multi-stage heating and cooling systems‚ ensuring proper functionality across various setups.
3.1 Heating and Cooling System Requirements
The Honeywell T4 Pro thermostat is compatible with single-stage and multi-stage heating and cooling systems‚ including heat pumps. It supports up to 1 heat stage and 1 backup heat stage‚ ensuring flexibility. Proper configuration is essential to match your HVAC system type‚ whether it’s a traditional furnace‚ heat pump‚ or dual-fuel setup. Always verify system compatibility before installation to ensure optimal performance and avoid operational issues.
3.2 Compatibility with Heat Pumps
The Honeywell T4 Pro thermostat is fully compatible with heat pumps‚ supporting up to 1 backup heat stage. It allows for seamless integration with heat pump systems‚ ensuring efficient temperature control. Proper configuration is required to match the heat pump’s operational modes. The thermostat supports both automatic and manual system changeover‚ making it versatile for heat pump installations. Always refer to the wiring diagram and system requirements to ensure compatibility and optimal performance.
Pre-Installation Checklist
Ensure you have all tools‚ materials‚ and compatible system requirements. Verify power sources‚ wiring‚ and safety precautions before starting the installation process for the Honeywell T4 Pro.
4.1 Tools and Materials Needed
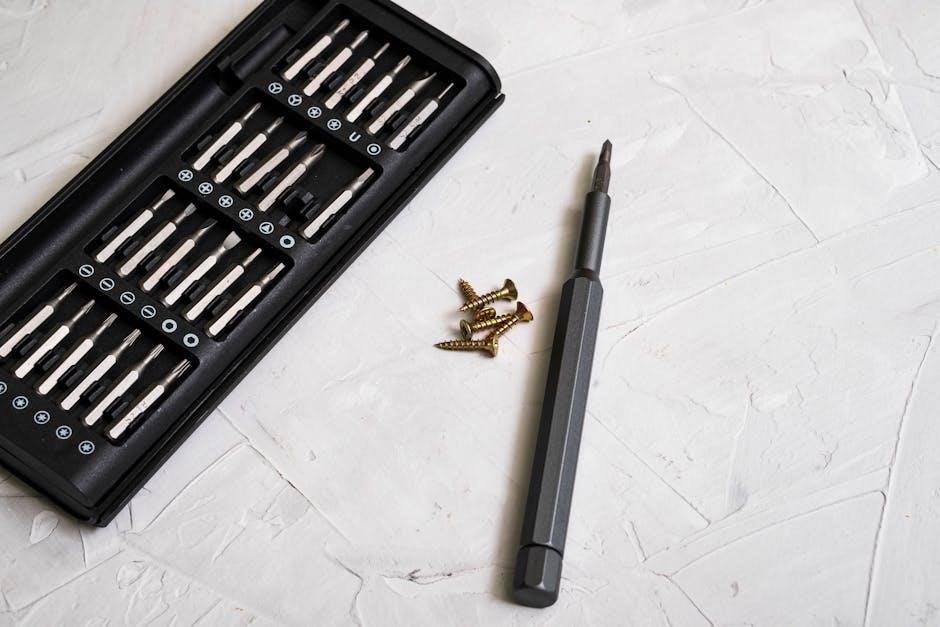
To install the Honeywell T4 Pro‚ you’ll need a screwdriver‚ drill‚ wall anchors‚ level‚ and voltage tester. Ensure you have the UWP mounting system‚ J-box adapter‚ decorative cover plate‚ screws‚ and 2 AA batteries from the package; Optional accessories like an additional cover plate may be purchased separately. Verify all items are included and compatible with your system before starting the installation process.
4.2 Safety Precautions
Before starting the installation‚ turn off the power to your HVAC system at the circuit breaker. Verify the power is off using a voltage tester to avoid electrical shock. Handle wires carefully to prevent damage. Improper wiring can lead to system malfunctions or safety hazards. If unsure about any step‚ consult a licensed HVAC professional to ensure a safe and correct installation. Always follow the manual’s guidelines to avoid risks.
Mounting the Thermostat
The Honeywell T4 Pro thermostat uses the UWP mounting system for secure installation. Attach the base plate to the wall using screws and anchors provided. Ensure the thermostat is level and firmly secured to the mounting system for proper functionality and appearance.
5.1 Choosing the Installation Location
Choosing the right location for your Honeywell T4 Pro thermostat is crucial for accurate temperature sensing and system efficiency. Ideally‚ install it on an interior wall at eye level‚ away from direct sunlight‚ drafts‚ and HVAC vents. Ensure the area is clear of obstructions and represents the average room temperature. Use the UWP mounting system provided‚ ensuring the surface is level and secure. This placement ensures optimal performance and reliable temperature control for your home.
5.2 Installing the Mounting System
Begin by unpacking the UWP mounting system and J-box adapter from the package. Ensure the wall surface is level and clean. Use the provided screws and anchors to secure the base plate to the wall. Align the plate carefully to avoid tilting. If installing on a junction box‚ attach the J-box adapter first. Tighten all screws firmly to ensure stability. Once the mounting system is in place‚ it will hold the thermostat securely‚ ready for wiring and final setup.

Wiring the Thermostat
Refer to the wiring diagram for precise connections. Ensure all wires are securely attached to the correct terminals. The C-wire is essential for continuous power. Always turn off the power supply before wiring to avoid electrical hazards.
6.1 Understanding the Wiring Diagram
The wiring diagram in the Honeywell T4 Pro manual provides a detailed visual guide for connecting wires to the thermostat. It labels terminals such as R‚ W‚ Y‚ G‚ C‚ and O/B‚ ensuring proper connections. Color-coding helps identify wires for heating‚ cooling‚ and fan control. Always match wires to their corresponding terminals to avoid system malfunctions.
Refer to the diagram to confirm compatibility with your HVAC system. The C-wire is crucial for continuous power‚ so verify its connection before proceeding with installation.
6.2 Connecting the Wires to the Thermostat
When connecting wires to the Honeywell T4 Pro thermostat‚ ensure each wire is securely attached to the correct terminal. Match the wires from your HVAC system to the thermostat’s terminals (R‚ W‚ Y‚ G‚ C‚ O/B) as shown in the wiring diagram. The C-wire provides constant power and is essential for proper operation. Double-check all connections to avoid errors.
Turn off power to your HVAC system before connecting wires. If unsure about any connection‚ consult the manual or contact a professional to avoid damage or safety risks.
6.3 Importance of the C-Wire
The C-wire (common wire) is essential for providing constant power to the Honeywell T4 Pro thermostat‚ enabling features like Wi-Fi connectivity and smart functionality. Without it‚ the thermostat may not power up or function correctly. Ensure the C-wire is connected to the “C” terminal on both the thermostat and your HVAC system. If your system lacks a C-wire‚ consider installing one or using a compatible adapter to maintain full functionality.
Powering the Thermostat
The Honeywell T4 Pro can be powered using 2 AA batteries or hardwired with a C-wire for constant power. Ensure proper power setup for optimal functionality.
7.1 Battery Installation
Install 2 AA batteries by removing the battery compartment located on the back of the thermostat. Insert the batteries ensuring correct polarity‚ as indicated by the diagram. Replace the compartment securely. If the thermostat doesn’t turn on‚ check the batteries and connections. For continuous power‚ consider hardwiring with a C-wire‚ though batteries provide reliable backup power during outages.
7.2 Hardwiring Options
The Honeywell T4 Pro offers hardwiring options using a C-wire for continuous power. This is essential for systems requiring a common wire. Ensure your HVAC system is compatible before proceeding. Always turn off the power at the circuit breaker during installation. Refer to the wiring diagram in the manual for precise connections. If unsure‚ consult a licensed HVAC professional to avoid any potential issues.

Final Installation Steps
Secure the thermostat to the wall using the provided screws. Test the system to ensure proper functionality. Verify heating‚ cooling‚ and fan operations before finalizing the setup.
8.1 Securing the Thermostat to the Wall
Use the provided screws and anchors to mount the thermostat firmly. Ensure the device is level and aligned properly with the wall. Gently press the thermostat onto the mounting system until it clicks securely. Avoid over-tightening to prevent damage. Refer to the installation manual for specific torque guidelines. Once secured‚ double-check the thermostat’s stability and ensure all wires are neatly organized behind the unit for a clean finish.
8.2 Testing the Thermostat
After securing the thermostat‚ turn on the HVAC system to test its functionality. Check if the display lights up and responds to button presses. Verify that heating and cooling modes activate correctly by adjusting the temperature settings. Ensure the fan control operates as expected. Review the on-screen menu to confirm all programmed settings are functioning properly. If any issues arise‚ refer to the troubleshooting section in the manual for guidance.
Configuring the Thermostat
The Honeywell T4 Pro thermostat offers intuitive on-screen menus for easy setup. Program schedules‚ adjust temperature limits‚ and enable features like automatic system changeover with step-by-step guidance.
9.1 Setting Up the Initial Menu
Access the initial menu by pressing the menu button on the Honeywell T4 Pro thermostat. Navigate through options to set the time‚ date‚ and preferred temperature units. Enable features like programmable scheduling and automatic system changeover. The thermostat learns your system’s response to reach desired temperatures efficiently. Follow on-screen prompts for a seamless setup experience‚ ensuring all settings align with your HVAC system’s capabilities and your comfort preferences.
9.2 Adjusting Temperature Limits
The Honeywell T4 Pro allows you to set temperature limits to prevent extreme settings‚ ensuring energy efficiency and system protection. Navigate to the temperature limits option in the menu and adjust the minimum and maximum settings for both heating and cooling. Default settings are pre-programmed‚ but you can customize them to suit your preferences. This feature helps maintain comfort while optimizing energy usage‚ ensuring your system operates within safe and efficient parameters.
Programming the Thermostat
The Honeywell T4 Pro offers programmable scheduling‚ allowing you to create a weekly schedule with specific temperature settings for different times of the day‚ optimizing comfort and energy use.
10.1 Creating a Weekly Schedule
The Honeywell T4 Pro allows you to create a customized weekly schedule‚ enabling you to set specific temperature preferences for different days and times. Access the menu‚ select the schedule option‚ and adjust the temperature settings for each day. You can program up to four periods per day‚ ensuring optimal comfort and energy efficiency. The thermostat also learns your system’s behavior‚ adjusting heating or cooling start times to meet your schedule precisely.
10.2 Setting Up Automatic System Changeover
The Honeywell T4 Pro offers automatic system changeover‚ allowing seamless transitions between heating and cooling modes based on your programmed schedule and temperature limits. This feature ensures optimal energy efficiency and comfort by automatically adjusting the system operation. Users can enable auto mode for hands-free transitions or manually override when needed. The thermostat also learns your system’s behavior‚ adjusting start times to reach the desired temperature efficiently‚ enhancing overall performance and user convenience.
Advanced Features
The Honeywell T4 Pro offers programmable scheduling‚ fan control options‚ and automatic system changeover. It learns your system’s behavior to optimize performance and energy efficiency.
11.1 Programmable Scheduling
The Honeywell T4 Pro allows users to create customized weekly schedules‚ optimizing comfort and energy efficiency. Program different temperatures for each day‚ ensuring your home is comfortable when needed. The thermostat learns your system’s behavior‚ adjusting heating and cooling times to meet setpoints precisely. This feature integrates seamlessly with automatic system changeover‚ enabling smooth transitions between heating and cooling modes based on your schedule and preferences.
11.2 Fan Control Options
The Honeywell T4 Pro offers flexible fan control options‚ allowing users to manage airflow efficiently. You can set the fan to run continuously or cycle with your heating and cooling system. This feature enhances air circulation‚ ensuring consistent temperatures throughout your home. Additionally‚ the thermostat supports automatic fan operation‚ optimizing energy use and comfort. These settings can be easily adjusted through the thermostat’s menu‚ providing precise control over your indoor environment.
Troubleshooting Common Issues
The manual addresses common issues like the thermostat not turning on‚ incorrect temperature readings‚ or wiring problems. It provides step-by-step solutions to resolve these issues efficiently.
12.1 Thermostat Not Turning On
If the Honeywell T4 Pro thermostat fails to turn on‚ check the power source and wiring connections. Ensure the C-wire is properly connected if required. Verify that the thermostat is correctly installed and configured. Review the wiring diagram in the manual to confirm all connections are accurate. If issues persist‚ restart the system or consult a professional for assistance. Always follow safety precautions to avoid electrical hazards.
12.2 Incorrect Temperature Readings
If the Honeywell T4 Pro displays incorrect temperatures‚ ensure proper calibration. Check wiring connections‚ especially the C-wire‚ and verify the thermostat is level. Recalibrate the temperature by navigating to the menu and adjusting the offset. Ensure no direct sunlight or drafts affect the sensor. If issues persist‚ consult the manual or contact Honeywell support for further assistance. Proper installation and configuration are key to accurate temperature readings.
12.3 Wiring Issues
Wiring issues can prevent the Honeywell T4 Pro from functioning correctly. Ensure all connections match the wiring diagram in the manual; Verify the C-wire is properly connected if required. Check for loose wires or incorrect assignments. Turn off power before making adjustments. If problems persist‚ consult the troubleshooting section or contact Honeywell support. Correct wiring is essential for accurate temperature control and system operation. Always refer to the manual for specific guidance.
12.4 System Compatibility Problems
System compatibility issues may arise if the Honeywell T4 Pro is not properly matched with your HVAC system. Ensure your system meets the thermostat’s requirements‚ especially for heat pumps or multi-stage systems. Refer to the manual for compatibility checks. If issues persist‚ verify wiring and configuration settings. Contact Honeywell support for assistance. Proper system alignment ensures optimal performance and avoids operational errors. Always confirm compatibility before installation to guarantee smooth functionality.

Maintenance and Care
Regularly clean the Honeywell T4 Pro thermostat with a soft cloth to ensure optimal performance. Replace batteries every 12 months or as needed. Check for firmware updates to maintain functionality and longevity. Avoid harsh chemicals to prevent damage. Proper care extends the thermostat’s lifespan and ensures accurate temperature control and system efficiency.
13.1 Cleaning the Thermostat
Regular cleaning ensures the Honeywell T4 Pro thermostat operates efficiently. Use a soft‚ dry cloth to wipe the display and exterior. For stubborn marks‚ lightly dampen the cloth with water‚ but avoid harsh chemicals or abrasive materials. Clean the vents and sensors to maintain accurate temperature readings. Never submerge the thermostat in water or expose it to excessive moisture. Proper cleaning prevents dust buildup and ensures reliable performance. Schedule cleaning every 3-6 months for optimal functionality.
13.2 Replacing Batteries
To maintain uninterrupted operation‚ replace the Honeywell T4 Pro thermostat’s batteries annually or when the low-battery indicator appears. Use two fresh AA alkaline batteries. Open the battery compartment‚ remove the old batteries‚ and insert the new ones‚ ensuring correct polarity. Close the compartment securely. If issues persist‚ refer to the manual for troubleshooting. Proper battery replacement ensures accurate temperature control and prevents system malfunctions. Always use high-quality batteries for reliable performance.
Warranty and Support
The Honeywell T4 Pro thermostat is backed by a comprehensive warranty and dedicated customer support. Visit Honeywell’s official website for detailed warranty information and assistance options.
14.1 Warranty Information
The Honeywell T4 Pro thermostat is covered by a limited warranty‚ ensuring protection against defects in materials and workmanship. The warranty period varies depending on the product and usage. For detailed warranty terms‚ refer to the official Honeywell website or the manual provided with your thermostat. Proper registration and adherence to installation guidelines are essential to maintain warranty validity. Contact Honeywell support for any warranty-related inquiries or claims.
14.2 Contacting Honeywell Support
For assistance with your Honeywell T4 Pro thermostat‚ visit the official Honeywell Home website. Utilize the support section for FAQs‚ troubleshooting guides‚ and contact options. You can reach Honeywell support via phone‚ email‚ or live chat. Additionally‚ the website offers downloadable manuals‚ video tutorials‚ and a comprehensive resource library to address common issues and installation queries. Ensure to have your product details ready for efficient support.
Additional Resources
Visit Honeywell’s official website for downloadable manuals‚ video tutorials‚ and detailed support articles. Explore YouTube for installation guides and troubleshooting tips specific to the T4 Pro thermostat.
15.1 Online Manuals and Guides
The Honeywell T4 Pro installation manual and user guide are available online as downloadable PDFs. Visit the official Honeywell Home website for comprehensive resources‚ including detailed wiring diagrams and troubleshooting tips. Additional support can be found through video tutorials on YouTube and Honeywell’s support page‚ ensuring a smooth installation and operation experience.
15.2 Video Tutorials
Video tutorials for the Honeywell T4 Pro are available on platforms like YouTube and Honeywell’s official website. These tutorials provide step-by-step guidance for installation‚ programming‚ and troubleshooting. They cover topics such as wiring‚ scheduling‚ and advanced features‚ making the setup process more accessible. Users can also find tutorials on Honeywell’s support page‚ ensuring a seamless experience for both new and experienced users.
The Honeywell T4 Pro Installation Manual provides a comprehensive guide for successful setup and operation; Proper installation and configuration ensure optimal performance‚ comfort‚ and energy efficiency for your home.
16.1 Final Tips for Successful Installation
For a seamless installation‚ follow the manual closely‚ ensuring all wiring connections are secure and correct. Verify the C-wire is connected if required. Test the thermostat thoroughly after installation to confirm proper functionality. Refer to Honeywell’s support resources for troubleshooting guidance. Regularly update settings and maintain the device for optimal performance. By adhering to these steps‚ you’ll ensure efficient operation and long-term reliability of your Honeywell T4 Pro Thermostat.