The Honeywell TH8321WF1001 is a Wi-Fi-enabled, 7-day programmable thermostat designed for smart home integration․ It offers advanced features like touchscreen control, energy-saving modes, and remote access․ The installation manual provides step-by-step guidance for proper setup, ensuring optimal performance and efficiency․ This guide is essential for both new installations and upgrades, helping users maximize the thermostat’s capabilities while minimizing energy consumption․
1․1 Overview of the Honeywell TH8321WF1001 Model
The Honeywell TH8321WF1001 is a Wi-Fi-enabled, 7-day programmable thermostat from the VisionPRO 8000 series․ Designed for residential and light commercial use, it supports up to 3 Heat/2 Cool systems, including heat pumps․ This model features a touchscreen interface, dual-power options (battery or hardwired), and a micro SD port for quick installer setup․ It is ENERGY STAR certified and compatible with smart home systems, offering advanced features like geofencing and smart recovery for energy efficiency; The installation manual provides detailed guidance for proper setup and configuration․
1․2 Importance of the Installation Manual
The installation manual for the Honeywell TH8321WF1001 is crucial for ensuring correct setup and optimal performance․ It provides detailed, step-by-step instructions to guide users through the installation process, from preparing the wallplate to connecting wires and configuring settings․ Proper installation prevents system malfunctions and ensures energy efficiency․ The manual also covers safety precautions and troubleshooting tips, making it an essential resource for both DIY enthusiasts and professional installers to achieve a seamless and efficient setup of the thermostat․
1․3 Key Features of the Thermostat
The Honeywell TH8321WF1001 boasts a touchscreen interface, 7-day programmability, and Wi-Fi connectivity for remote control via smartphones․ It supports geofencing, smart recovery, and energy-saving modes․ The thermostat is compatible with various HVAC systems, including heat pumps and conventional systems, and offers advanced features like IAQ settings for indoor air quality management․ Its dual-power design allows for hardwired or battery operation, ensuring flexibility and reliability․ These features make it a versatile and efficient solution for modern smart home systems․
Pre-Installation Requirements
Ensure compatibility with your HVAC system, gather necessary tools, and follow safety precautions before starting the installation․ Proper preparation ensures a smooth and safe setup process․
2․1 Compatibility Check for HVAC Systems
Before installation, verify that the Honeywell TH8321WF1001 is compatible with your HVAC system․ It supports heat pumps (up to 3 Heat/2 Cool stages) and conventional systems (up to 2 Heat/2 Cool stages)․ Ensure compatibility with dehumidification, humidification, or ventilation systems if applicable․ Check the system’s wiring and voltage requirements to confirm they match the thermostat’s specifications․ Proper compatibility ensures seamless operation and avoids potential installation issues․ Refer to the installation manual for detailed compatibility guidelines․
2․2 Tools and Materials Needed
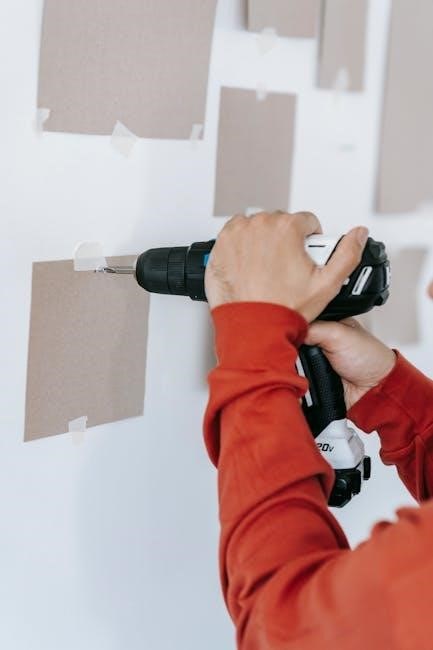
To install the Honeywell TH8321WF1001, gather the necessary tools and materials․ You will need a screwdriver (Phillips and flathead), wire strippers, and a voltage tester․ Ensure you have the thermostat unit, wallplate, mounting screws, and wall anchors provided in the package․ Additional materials like a drill or level may be required for wall preparation․ Refer to the installation manual for a complete list of tools and materials to ensure a smooth setup process․
2․3 Safety Precautions Before Starting
Before installing the Honeywell TH8321WF1001, ensure all safety precautions are followed․ Turn off power to the HVAC system at the circuit breaker or fuse box․ Verify the system voltage matches the thermostat’s requirements․ Handle wires carefully to avoid damage or electrical shock․ Wear protective gear if necessary․ Ensure the area is clear of debris and flammable materials․ Follow the installation manual instructions precisely to avoid damaging the thermostat or HVAC system components․
Installation Process
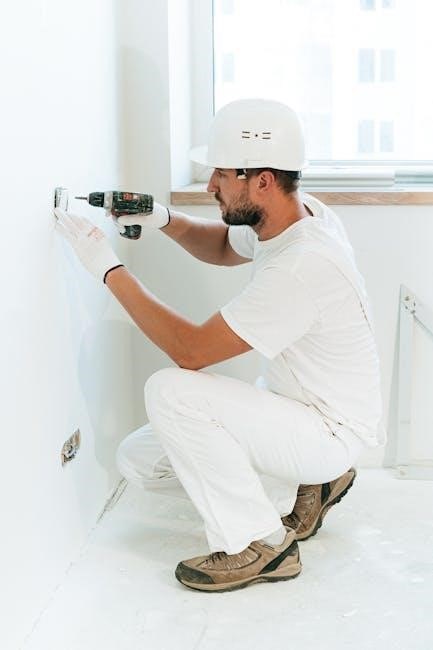
The Honeywell TH8321WF1001 installation involves separating the wallplate, mounting it, connecting wires, attaching the thermostat, and restoring power․ Follow the manual for precise steps․
3․1 Preparing the Thermostat and Wallplate
Start by separating the thermostat from the wallplate․ Press the button on the top and gently pull to remove the wallplate․ Handle the thermostat by the edges to avoid damage․ Ensure the wallplate is properly aligned before mounting․ Refer to the installation manual for detailed instructions on preparing both components for a smooth setup process․ This step ensures a secure and accurate installation, preventing potential issues during operation․
3․2 Disconnecting Power to the HVAC System
Before starting the installation, ensure the HVAC system’s power is turned off at the circuit breaker or fuse box․ Verify the power is off using a voltage tester to avoid electrical shock․ The Honeywell TH8321WF1001 thermostat is dual-powered, either by batteries or hardwired, so disconnecting the main power supply is essential․ This step ensures safety during the removal of the old thermostat and the installation of the new one․ Always follow the installation manual guidelines for safe procedures;
3․3 Removing the Old Thermostat
To remove the old thermostat, start by detaching it from the wallplate․ Gently pull the thermostat away from the wall while pressing the release button located at the top․ This will disengage it from the mounting system․ Once removed, carefully handle the wires to avoid damage․ Label each wire according to its terminal for easy identification during the new installation․ Ensure all connections are loose before fully detaching the old unit․ Follow the installation manual for safe and proper removal procedures․
3․4 Mounting the Wallplate
Separate the wallplate from the thermostat by pressing the button at the top and pulling it away․ Mount the wallplate on the wall, ensuring it is level and securely fastened․ Use the screws provided in the installation manual to attach it firmly․ Make sure the wallplate is properly aligned to accommodate the thermostat’s connectors․ Follow the manual’s guidance for correct placement and screw tightening to ensure a stable base for the new thermostat․ Proper mounting is crucial for reliable operation and connectivity․
3․5 Connecting the Wires
Match the wires from your HVAC system to the corresponding terminals on the wallplate, following the installation manual․ Use the screws provided to secure the wires tightly․ Ensure all connections are correct and snug to avoid loose wires, which can cause malfunctions․ Refer to the wiring diagram in the manual for specific terminal assignments․ Double-check the connections before proceeding to the next step․ Proper wire connections are essential for the thermostat to function correctly and communicate with your HVAC system effectively․
3․6 Attaching the Thermostat to the Wallplate
Align the thermostat with the wallplate, ensuring the tabs or screws match up․ Gently press the thermostat onto the wallplate until it clicks securely into place․ Verify that the thermostat is evenly aligned and the display is level․ Use the screws provided in the kit to tighten the thermostat to the wallplate, ensuring a snug fit․ Avoid over-tightening, which could damage the device․ Once attached, double-check that all connections are secure and the thermostat is properly seated for optimal functionality․
3․7 Restoring Power and Testing
Once all connections are secure, restore power to the HVAC system at the circuit breaker․ Turn the power back on and ensure the thermostat display lights up․ Test the thermostat by adjusting the temperature settings to confirm the system responds correctly․ Check both heating and cooling modes to verify proper operation․ If connected to Wi-Fi, ensure the thermostat successfully connects to your network․ Review all functions to ensure everything operates as expected before finalizing the installation․
Initial Setup and Configuration
After installation, set up basic functions like temperature control and scheduling․ Configure Wi-Fi connectivity for smart features․ Adjust settings and options to customize your system’s operation․
4․1 Setting Up the Thermostat’s Basic Functions
Setting up the Honeywell TH8321WF1001’s basic functions is straightforward․ Start by navigating the menu to set your preferred temperature and schedule․ Use the mode control buttons to switch between heating, cooling, or fan-only modes․ The menu also allows you to view equipment status and adjust basic settings․ Ensure the thermostat is in the correct mode for your system type․ Refer to the installation manual for detailed steps to configure these functions properly and optimize performance․
4․2 Configuring Wi-Fi Connectivity
To configure Wi-Fi connectivity for the Honeywell TH8321WF1001, navigate to the network settings in the menu․ Select your Wi-Fi network from the available options and enter the password using the touchscreen interface․ Ensure the thermostat is in a location with a strong signal for reliable connection․ Once connected, the thermostat will update and sync with your smart home system․ Refer to the installation manual for troubleshooting tips if connectivity issues arise․
4․3 Setting Temperature Schedules
Setting temperature schedules on the Honeywell TH8321WF1001 allows for customized comfort and energy efficiency․ Use the touchscreen interface to create 7-day schedules with different settings for wake, sleep, and away periods․ Select specific times and temperatures for each day, ensuring optimal comfort while reducing energy waste․ The thermostat also offers smart recovery features to gradually adjust temperatures before scheduled times․ Refer to the installation manual for detailed guidance on configuring these settings to maximize efficiency and convenience․
4․4 Adjusting Installer Options
Adjusting installer options on the Honeywell TH8321WF1001 allows for fine-tuning system settings to meet specific HVAC requirements․ Access the advanced menu to modify parameters such as HVAC staging, dehumidification, and ventilation controls․ These settings ensure compatibility with various heating and cooling systems․ Refer to the installation manual for detailed instructions on configuring these options, ensuring optimal system performance and efficiency․ Proper adjustment of these settings is crucial for achieving desired comfort levels and energy savings․

Advanced Features and Settings
The Honeywell TH8321WF1001 offers advanced features like IAQ settings, geofencing, and smart recovery․ Its menu system provides detailed controls for optimal comfort and energy efficiency․
5․1 Understanding the Menu System
The Honeywell TH8321WF1001 features an intuitive menu system designed for easy navigation․ Mode control buttons allow adjustments for fan or system settings, while the menu provides options to set schedules, view equipment status, and modify IAQ settings․ Users can access installer options for advanced configurations․ The current display shows system mode, outdoor temperature, and humidity, offering real-time insights․ This user-friendly interface ensures seamless control over heating, cooling, and air quality, with detailed guidance available in the installation manual․
5․2 Navigating the Installer Options
The Installer Options on the Honeywell TH8321WF1001 allow technicians to configure advanced settings for optimal system performance․ These options include enabling or disabling specific features like dehumidification, ventilation, and auxiliary heat․ The installation manual provides detailed instructions for navigating these settings, ensuring compatibility with various HVAC systems․ Proper configuration of Installer Options is crucial for system efficiency and functionality, especially for models like the TH8321U1097, which support up to 3 Heat/2 Cool systems․ This section is essential for installers to tailor the thermostat to the user’s specific needs․
5․3 Accessing the Advanced Settings
Accessing the advanced settings on the Honeywell TH8321WF1001 requires navigating through the menu system․ These settings allow for fine-tuning features like IAQ (Indoor Air Quality) and geofencing․ The installation manual provides detailed steps to access these options, ensuring optimal system performance․ Advanced settings are crucial for customizing the thermostat to specific HVAC configurations and user preferences․ The manual also highlights how to adjust these settings for energy efficiency and smart home integration, making it a comprehensive guide for both installers and users․
5․4 Utilizing the IAQ (Indoor Air Quality) Settings
The Honeywell TH8321WF1001 offers advanced IAQ settings to enhance indoor air quality․ These settings allow control over humidity levels, ventilation, and air purification․ The installation manual provides guidance on configuring IAQ features, ensuring proper integration with HVAC systems․ By enabling these settings, users can improve air circulation, reduce moisture, and create a healthier indoor environment․ The IAQ settings also contribute to energy efficiency by optimizing system performance based on air quality needs․ Proper setup ensures maximum comfort and air quality management․

Maintenance and Troubleshooting
Regularly update software, clean the touchscreen, and check wire connections to maintain performance․ Refer to the installation manual for troubleshooting common issues and solutions․
6․1 Regular Maintenance Tips
Regular maintenance ensures optimal performance of the Honeywell TH8321WF1001 thermostat․ Clean the touchscreen regularly with a soft cloth to prevent dust buildup․ Check wire connections to avoid loose links, and update the software periodically for the latest features․ Refer to the installation manual for detailed guidance on troubleshooting common issues․ Additionally, inspect the HVAC system compatibility and ensure proper power supply․ These practices help maintain efficiency, extend the thermostat’s lifespan, and prevent unexpected malfunctions․
6․2 Common Issues and Solutions
Common issues with the Honeywell TH8321WF1001 include Wi-Fi connectivity problems, display malfunctions, and incorrect temperature readings․ For connectivity issues, ensure the thermostat is connected to the correct network and restart the device․ If the display is unresponsive, clean the touchscreen or check for loose wiring connections․ Temperature inaccuracies may require recalibration via the menu system․ Refer to the installation manual for troubleshooting steps and solutions to restore functionality and ensure proper performance․
6․3 Understanding Error Codes
The Honeywell TH8321WF1001 may display error codes like E1, E2, or E3, indicating issues such as sensor malfunctions or system mismatches․ These codes are designed to help diagnose problems quickly․ Refer to the installation manual for a detailed list of error codes and their meanings․ Solutions often involve recalibrating sensors, checking wiring connections, or resetting the thermostat․ Understanding these codes ensures efficient troubleshooting and maintains optimal performance of your HVAC system․
6․4 Resetting the Thermostat
Resetting the Honeywell TH8321WF1001 thermostat can resolve many issues․ To reset, press and hold the Menu button for 5 seconds until the display clears․ This restores factory settings, clearing schedules and preferences․ For a full reset, remove the thermostat from the wallplate and take out the batteries (if applicable) for 30 seconds․ Reinstall and follow the setup process․ The installation manual provides detailed steps for resetting and restarting the device effectively․

Energy Efficiency and Savings
The Honeywell TH8321WF1001 optimizes energy usage through smart scheduling, geofencing, and smart recovery features․ It monitors consumption and adjusts settings to maximize efficiency, reducing energy waste and lowering bills․
7․1 Optimizing Energy Usage with Schedules
The Honeywell TH8321WF1001 allows users to create custom 7-day schedules, optimizing energy usage by adjusting temperatures based on daily routines․ By setting specific times for heating and cooling, homeowners can avoid unnecessary energy consumption․ The thermostat learns preferences over time, automatically adapting to maintain comfort while saving energy․ Features like smart scheduling and energy-saving modes ensure efficient operation, reducing waste and lowering utility bills without compromising comfort․
7․2 Using Geofencing for Smart Energy Management
The Honeywell TH8321WF1001 supports geofencing, a feature that uses your smartphone’s location to manage energy usage․ When you leave home, the thermostat automatically adjusts the temperature to an energy-saving mode․ Upon returning, it restores your preferred settings, ensuring comfort while reducing waste․ This smart technology integrates seamlessly with your daily routine, optimizing energy consumption without manual adjustments․ Geofencing enhances efficiency and convenience, making it a key tool for modern energy management․
7․3 Leveraging Smart Recovery Features
The Honeywell TH8321WF1001 offers smart recovery, a feature that learns your HVAC system’s operation to preheat or precool your home․ It ensures the desired temperature is reached by your scheduled time, optimizing energy use․ This intelligent function reduces energy waste by avoiding unnecessary heating or cooling when the home is unoccupied․ Smart recovery integrates seamlessly with programmable schedules, enhancing comfort while maintaining efficiency․ It’s a powerful tool for balancing energy savings and home comfort effectively․
7․4 Monitoring Energy Consumption
The Honeywell TH8321WF1001 allows users to monitor energy consumption through its intuitive interface and the Honeywell Home app․ It provides real-time data on energy usage, helping homeowners track their consumption patterns․ Historical reports offer insights into past energy use, enabling informed decisions to reduce waste․ This feature is accessible via the thermostat or remotely, making it easy to identify trends and optimize energy usage for greater efficiency and cost savings․
Integration with Smart Home Systems
The Honeywell TH8321WF1001 seamlessly integrates with popular smart home platforms like Amazon Alexa and Google Home․ Voice control and remote access via the Honeywell Home app enhance convenience and efficiency, allowing users to manage their HVAC system effortlessly from anywhere․
8․1 Compatibility with Smart Home Platforms
The Honeywell TH8321WF1001 is compatible with major smart home systems, including Amazon Alexa and Google Home․ This integration allows for seamless voice control and remote management through the Honeywell Home app․ Users can effortlessly adjust settings, monitor energy usage, and receive notifications․ The thermostat’s Wi-Fi connectivity ensures smooth integration, enabling a unified smart home experience․ This compatibility enhances convenience, energy efficiency, and overall system control, making it a versatile choice for modern smart homes․
8․2 Voice Control Integration
The Honeywell TH8321WF1001 supports voice control through Amazon Alexa and Google Home, enabling hands-free adjustments․ Users can change temperatures, switch modes, or adjust schedules using voice commands․ This feature enhances convenience and accessibility, allowing seamless integration with smart home ecosystems․ The thermostat’s compatibility with popular voice assistants ensures easy control, making it a modern solution for energy management․ Voice control integration simplifies daily interactions, providing a user-friendly experience while maintaining energy efficiency and smart home automation capabilities․
8․3 Remote Access and Control
The Honeywell TH8321WF1001 offers remote access and control through the Honeywell Home app, allowing users to adjust settings, monitor energy usage, and receive notifications from anywhere․ This feature enhances convenience, enabling users to manage their HVAC system remotely․ The app provides real-time updates, ensuring optimal comfort and energy efficiency․ Remote control is particularly useful for adjusting temperatures before arriving home or addressing issues without physical access to the thermostat, making it a versatile solution for modern smart home needs․
8․4 Smart Home Automation Scenarios
The Honeywell TH8321WF1001 seamlessly integrates with smart home systems, enabling automation scenarios like geofencing and voice control․ Users can set up routines to adjust temperatures based on location or time․ For example, the thermostat can lower the temperature when you leave home and resume your preferred setting upon return․ Voice commands via Amazon Alexa or Google Assistant add convenience, while smart schedules optimize energy use․ These automation features enhance comfort and efficiency, making the thermostat a central component of a modern smart home ecosystem․
The Honeywell TH8321WF1001 installation manual is essential for proper setup, ensuring efficiency and access to all features․ Download the PDF guide for a seamless experience․
9․1 Summary of Key Installation Steps
The Honeywell TH8321WF1001 installation involves separating the wallplate from the thermostat, mounting it, and connecting wires․ Ensure compatibility with your HVAC system and follow safety precautions․ After mounting, attach the thermostat to the wallplate and restore power․ Refer to the installation manual for detailed steps, ensuring proper setup for optimal performance․ This guide is crucial for both new installations and upgrades, providing clear instructions to maximize efficiency and functionality․
9․2 Benefits of Proper Installation
Proper installation of the Honeywell TH8321WF1001 ensures optimal performance, efficiency, and compatibility with your HVAC system․ It enhances energy efficiency, reducing energy bills and extending equipment lifespan․ Correct setup also enables advanced features like remote access, scheduling, and smart home integration․ By following the installation manual, you ensure a seamless user experience, reliable operation, and access to all smart functionalities, making it a worthwhile investment for modern home comfort and energy management․
9․3 Encouragement for Further Exploration
Exploring the Honeywell TH8321WF1001 beyond installation unlocks its full potential․ Dive into advanced features like smart recovery and geofencing to optimize energy use․ Experiment with custom schedules and IAQ settings for enhanced comfort․ The detailed user manual and online resources provide guidance for maximizing functionality․ By exploring these features, you can tailor the thermostat to your lifestyle, ensuring maximum efficiency and convenience while enjoying the benefits of smart home integration․