Mastering hoodie logo placement is crucial for creating professional, stylish designs. This guide covers industry-standard measurements, strategic zones, and practical tips to ensure your designs stand out perfectly.
1.1 Importance of Proper Logo Placement
Proper logo placement on hoodies is essential for enhancing brand visibility and creating a professional appearance. It ensures designs are visually appealing and functional, avoiding awkward positioning that can detract from the garment’s aesthetic. Correct placement balances style and functionality, making the logo stand out while complementing the hoodie’s design. Whether for chest, back, or sleeve logos, precise placement ensures the design looks intentional and polished. This attention to detail elevates the product’s quality, making it more attractive to consumers and reinforcing brand identity. Proper placement also ensures consistency across different hoodie styles and sizes, maintaining a cohesive look for your brand.
1.2 Brief Overview of Hoodie Design Zones
Hoodies feature distinct design zones that serve as prime areas for logo placement. The chest, back, sleeves, hood, and pockets are the primary zones. The chest area, including center and left chest, is ideal for small to medium logos, while the back offers space for larger designs. Sleeves provide a subtle yet stylish spot for smaller graphics or text. The hood itself can display logos on the front or back, and pockets offer a unique placement option. Understanding these zones helps in selecting the most impactful location for your design, ensuring it aligns with your brand’s aesthetic and messaging goals.
Industry-Standard Placement Areas
Industry-standard placement areas for hoodie logos include the chest, back, sleeves, hood, and pockets. These zones ensure designs are visually appealing and professionally aligned for maximum impact.
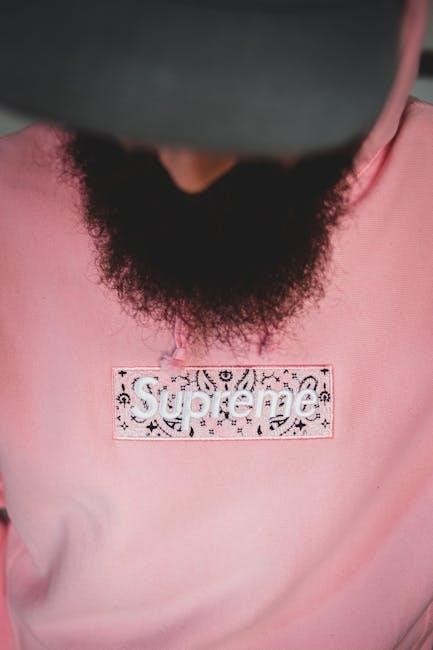
2.1 Chest Placement: Center and Left Chest
Chest placement is a popular choice for hoodie logos, offering high visibility. For center chest, measure 3 inches down from the collar, ensuring the logo is centered. The left chest placement uses the seam intersection as an anchor, typically 3.5-4 inches wide. Both options provide a clean, professional look. The finger-width technique—four fingers below the neckline—helps align logos accurately. Industry standards suggest 3-4 inches for center chest and 3.5-4 inches for left chest designs. These measurements ensure logos are proportionate and visually appealing, making them ideal for branding and aesthetic balance.
2.2 Back Placement: Upper Back and Full Back
Back placement offers two primary options: upper back and full back; The upper back placement centers the logo between the shoulder blades, typically 8-10 inches wide, creating a bold yet balanced look. Full back placement allows for larger designs, often 10-12 inches wide, covering the entire back for maximum visibility. Aligning the logo with the chest placement ensures consistency. For precise alignment, measure 8-10 inches below the neckline for upper back and 12-14 inches for full back designs. Testing on real garments or mannequins ensures accuracy and professional results, making back placement ideal for statement branding and detailed artwork.
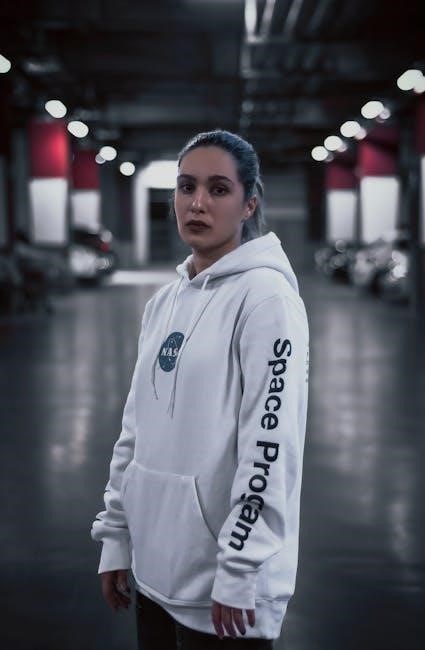
2.3 Sleeve Placement: Upper Arm and Forearm
Sleeve placement is a subtle yet effective way to enhance branding. The upper arm area, typically 4-6 inches below the shoulder seam, is ideal for small logos (2-3 inches wide). For the forearm, place designs 2-4 inches above the cuff, maintaining a similar size. Aligning sleeve logos with chest or back placements ensures a cohesive look. Testing on real garments or mannequins helps achieve precise alignment. This placement is perfect for complementary branding, adding a polished touch without overwhelming the design. Proper sizing and positioning ensure visibility and professionalism, making sleeve placement a versatile option for detailed or minimalist designs alike.
2.4 Hood Placement: Front and Back
The hood is a prime branding area, offering visibility from both front and back. For the front, place small logos (3-4 inches wide) 2-3 inches below the hood seam, centered for a clean look. On the back, larger designs (8-10 inches wide) can be centered for maximum impact. Ensure logos are proportional to the hood size and avoid overcrowding. Testing placements on actual hoodies or mannequins ensures accuracy. This strategic placement enhances brand visibility while maintaining a stylish, professional appearance, making the hood a versatile canvas for creative and functional branding solutions.
2.5 Pocket Placement: Above and Below the Pocket
Placing logos above or below the pocket enhances brand visibility while maintaining functionality. For above-pocket designs, position the logo 6-8 inches above the pocket seam, ensuring it’s centered and proportional to the hoodie size. Below-pocket placement works well for smaller logos, aligning them with the pocket’s bottom edge. Avoid overcrowding by keeping designs simple and balanced. The finger-width technique—placing four fingers above the pocket—ensures a visually appealing placement. This strategic approach maximizes brand impact while preserving the hoodie’s aesthetic, making it ideal for both casual and professional designs.
Measurements and Sizing Guidelines
Precise measurements ensure professional results. Standard logo sizes range from 3-4 inches for chest placement to 8-12 inches for back designs. Use the finger-width technique for alignment and test placements on real garments for accuracy.
3.1 Standard Logo Sizes for Different Areas
Standard logo sizes vary by placement area to ensure visual balance. Chest logos are typically 3-4 inches wide, while back logos range from 8-12 inches for maximum visibility. Sleeve logos are smaller, around 2-3 inches, to fit naturally on the arm. Hood logos are usually 4-6 inches wide, centered for symmetry. Pocket logos are placed 1-2 inches above the pocket, sized between 3-4 inches. These measurements ensure designs are proportional and visually appealing. Always test placements on real garments to confirm sizing and alignment for a professional finish.
3.2 Measuring Techniques for Precise Placement
Accurate measurements are essential for professional logo placement. Use a ruler or measuring tape to mark placement points. For chest logos, measure 3 inches down from the collar or align with the seam intersection. The finger-width technique—placing the logo four fingers below the neckline—ensures a balanced look. For back logos, center the design between the shoulders, 8-12 inches wide. Sleeves require smaller logos, 2-3 inches wide, positioned 5-6 inches below the shoulder seam. Always test placements on real garments or mannequins to ensure accuracy and visual appeal, adjusting as needed for a polished finish.
3.3 Adjusting Sizes for Youth and Adult Hoodies
Logo sizes vary between youth and adult hoodies to ensure proportionate designs. For adult hoodies, chest logos are typically 3-4 inches wide, while youth sizes range from 2-3 inches. Back logos for adults are 8-12 inches wide, and 6-8 inches for youth. Sleeve logos are 2-3 inches for adults and 1.5-2 inches for youth. Adjustments ensure the design is visually balanced and comfortable. Always test logo sizes on actual garments to confirm fit and visibility, ensuring the design complements the wearer without overwhelming the space.

Scaling Strategies for Different Fits
Scaling strategies ensure logos fit perfectly on slim, oversized, and unisex hoodies. Adjust sizes proportionally to maintain visibility and style, ensuring designs complement the garment’s fit and purpose.
4;1 Slim Fit Hoodies: Compact Logo Placement
For slim fit hoodies, compact logo placement is essential to maintain a sleek, modern aesthetic. Logos should be smaller, typically 3-4 inches wide, to complement the fitted design. Place logos on the center chest, 3-4 inches below the collar, or on the upper back for a subtle look. Avoid oversized designs that may overwhelm the garment. Use the finger-width technique—four fingers below the neckline—for precise chest placement. Ensure the logo aligns with the hoodie’s seams for a polished appearance. Testing on actual slim fit hoodies is crucial to confirm proportions and visual appeal.
4.2 Oversized Hoodies: Larger Logo Placement
Oversized hoodies allow for larger logo placements, enhancing visibility and impact. Logos can range from 8-12 inches wide on the back and 2-3 inches on sleeves. Place chest logos 4-5 inches below the collar for a balanced look. The full back is ideal for bold designs, while sleeves can accommodate larger graphics without overwhelming the garment. Use the collar as a reference point for alignment. Ensure the logo proportions match the hoodie’s loose fit. Testing on actual oversized hoodies is recommended to confirm sizing and placement accuracy, ensuring a visually appealing and professional finish.
4.3 Unisex Hoodies: Balanced Logo Placement
Unisex hoodies require balanced logo placement to appeal to a broad audience. Standard logo sizes range from 3-4 inches for chest placement and 8-10 inches for back placement. Center chest logos should be placed 3-4 inches below the collar, while left chest logos align with the seam. Back logos are centered between the shoulders for symmetry. Sleeve logos are smaller, typically 2-3 inches, and placed 2-3 inches above the cuff. Use mannequins to visualize proportions and ensure designs are neither too bold nor too subtle. This balanced approach ensures a professional, versatile look suitable for all body types and preferences.
Application Techniques for Logo Placement
Explore expert techniques like heat transfer vinyl, screen printing, and embroidery for precise logo placement. Each method offers unique benefits, ensuring professional results for every hoodie design.
5.1 Heat Transfer Vinyl: Best Practices
Heat transfer vinyl is a popular method for hoodie logo placement, offering crisp, durable results. Ensure precise alignment by measuring 3 inches down from the collar for chest logos and using seam intersections as anchors for left chest placements. Avoid common mistakes like misalignment or uneven pressure, which can distort the design. Test placements on real garments or mannequins to confirm accuracy. For larger designs, such as back logos, measure 8-12 inches wide, centered between the shoulders. Always pre-press the hoodie to remove moisture and ensure the vinyl adheres properly. Choose vinyl suitable for the fabric type to prevent peeling or cracking over time.
5.2 Screen Printing: Alignment and Registration
Screen printing requires precise alignment and registration to achieve sharp, professional results. Use registration marks on screens to ensure designs align perfectly, especially for multi-color prints. Measure 3 inches down from the collar for chest logos and center designs between the shoulders for back prints. The finger-width technique—four fingers below the neckline—is a reliable visual cue for chest placement. Test prints on actual garments to confirm accuracy and avoid costly mistakes. Proper alignment ensures symmetry and balance, making your designs look polished and professional; Always double-check placement before printing to maintain consistency and quality.
5.3 Embroidery: Placement for Maximum Visibility
Embroidery placement is key for maximum visibility and brand impact. For chest logos, position them 3-4 inches below the neckline, centered for a professional look. On the back, logos should be centered between the shoulders, 8-10 inches wide for larger designs. Sleeves can feature embroidery 5-6 inches above the cuff for a subtle yet visible effect. The front of the hood is ideal for smaller logos, placed 2-3 inches below the edge. Ensure designs are balanced and proportional to the garment size, avoiding overcrowding. Proper embroidery placement enhances aesthetics and ensures your brand stands out clearly. Always test designs on real hoodies for accuracy.
Tools and Software for Design Visualization
Digital tools like Canva and Gelato offer design templates and mockup generators, helping you visualize and standardize logo placements before production for precise and professional results.
6.1 Digital Mockup Generators
Digital mockup generators are essential tools for visualizing hoodie logo placements before production. Platforms like Canva and Gelato provide customizable templates, allowing designers to preview how logos will appear on various hoodie areas, such as the chest, back, or sleeves. These tools enable precise adjustments to size, position, and alignment, ensuring a professional finish. By creating accurate digital previews, designers can avoid costly mistakes and streamline the design process. Real-time visualization also helps in achieving consistency across different hoodie styles and fits, making it easier to communicate ideas to clients or team members.
6.2 Design Templates for Hoodie Placement
Design templates are invaluable for streamlining hoodie logo placement. They provide pre-defined layouts for common areas like the chest, back, sleeves, and pockets, ensuring consistency. Many templates are customizable, allowing designers to adjust measurements and positions to fit specific designs. Platforms like Canva and Gelato offer templates that cater to various hoodie styles, making it easier to visualize and standardize placements. These tools help maintain industry standards, ensuring logos are proportionate and visually appealing. By using templates, designers can save time and ensure professional results, while also facilitating clear communication between designers and manufacturers.
6.3 Measurement Tools for Accuracy
Accurate measurements are essential for professional hoodie logo placement. Tools like Sewtalent and digital mockup generators provide precise templates to ensure designs fit perfectly. Use rulers or measuring tapes to mark placement points, and consider the finger-width technique for chest logos. Testing designs on real garments or mannequins helps verify accuracy. Digital tools also offer visual guides, such as printable charts, to standardize measurements. By combining physical and digital tools, designers can achieve consistent, professional results, ensuring logos are perfectly aligned and sized for any hoodie style or design method.

Best Practices for Flawless Results
Test designs on real garments or mannequins, use visual guides for alignment, and avoid common placement mistakes to ensure professional, polished hoodie logo placement every time.
7.1 Testing on Real Garments
Testing logo placement on real garments ensures accuracy and visual appeal. Use mannequins or actual wearers to assess how designs look when worn. This step helps identify potential issues like distortion or misalignment. Pay attention to how the logo sits on fabric, especially around seams or pockets. Adjustments may be necessary based on garment type and size. Regular testing guarantees professional results and prevents costly mistakes. It’s a crucial step in achieving flawless, consistent logo placement for any hoodie design project.
7.2 Using Mannequins for Visualization
Mannequins are invaluable for visualizing logo placement on hoodies. They provide a realistic display of how designs appear on actual garments, allowing precise adjustments. Use mannequins to check logo positioning, alignment, and proportions. This step ensures the design looks balanced and professional. By simulating real-world wear, mannequins help identify potential issues before production. Regular use of mannequins enhances consistency and accuracy, making them a key tool in achieving flawless logo placement for hoodies. This practical approach guarantees designs look their best, whether for branding, fashion, or custom projects.
7.3 Avoiding Common Placement Mistakes
To ensure professional results, avoid common mistakes like incorrect measurements, poor alignment, and neglecting garment type. Measure carefully and test designs on real hoodies or mannequins. Avoid oversized logos on slim-fit hoodies and ensure symmetry. Use digital mockups to preview placements. Don’t overlook seam intersections or fabric grain. Stick to industry standards for sizing and positioning. Adjust for youth and adult fits separately. By addressing these pitfalls, you achieve precise, visually appealing logo placement that enhances your brand’s image and ensures customer satisfaction.

The Impact of Logo Placement on Branding
Proper logo placement enhances brand visibility, creating a professional look that balances aesthetics and functionality, ensuring your designs resonate effectively with your target audience.
8.1 Enhancing Brand Visibility
Strategic logo placement on hoodies significantly boosts brand visibility, making your designs more recognizable. High-visibility areas like the chest or back ensure your logo is easily seen, enhancing brand exposure. Consistent sizing and placement across products create a cohesive brand identity, while bold designs and contrasting colors draw attention. Proper alignment and spacing prevent clutter, ensuring your logo stands out. By following industry standards and best practices, you can maximize the visual impact of your brand, turning hoodies into effective marketing tools that resonate with your audience and leave a lasting impression.
8.2 Creating a Professional Look
Proper logo placement is essential for achieving a polished, professional appearance. Symmetrical alignment and balanced sizing ensure designs look intentional and cohesive. Avoiding clutter by leaving adequate space around logos prevents a chaotic look. High-quality materials and precise application methods, like embroidery or heat transfer, enhance the finish. Consistent branding across all products strengthens recognition. Using digital mockups to preview designs helps identify flaws before production. Testing placements on real garments ensures accuracy and professionalism, resulting in hoodies that exude quality and sophistication, making your brand stand out in a competitive market.
8.3 Balancing Aesthetics and Functionality
Balancing aesthetics and functionality ensures your hoodie designs are both visually appealing and practical. Strategic logo placement avoids obstructing functional elements like zippers or pockets while maintaining a stylish look. Choosing the right size and position prevents overwhelming the garment, ensuring comfort and wearability. Industry-standard measurements guide placements that enhance visibility without compromising usability. Digital mockups and mannequins help preview designs, ensuring a seamless blend of form and function. This balance elevates your brand’s appeal, creating products that are both attractive and comfortable to wear, ultimately enhancing customer satisfaction and loyalty to your brand.
Visual Examples and Templates
Explore printable charts, visual guides, and real-life examples to perfect your hoodie logo placement. These resources provide clear benchmarks for achieving professional, impactful designs every time.
9.1 Printable Placement Charts
Printable placement charts are essential tools for precise logo positioning. These charts provide clear visual benchmarks for chest, back, sleeve, and hood placements, ensuring consistency. They include standard logo sizes and measurement guidelines, helping designers avoid common mistakes. By using these charts, creators can achieve professional results effortlessly. The charts are customizable, catering to various hoodie styles and fits. They also highlight critical zones, such as the 6-8 inches above the pocket for chest logos. Downloadable templates offer a practical solution for visualizing designs before production, making the placement process efficient and error-free. These resources are invaluable for both beginners and experienced designers.
9.2 Visual Guides for Different Hoodie Styles
Visual guides provide detailed illustrations for logo placement on various hoodie styles, ensuring designs align with the garment’s unique features. These guides cater to slim-fit, oversized, and unisex hoodies, offering tailored strategies for each. They include measurements for chest, back, and sleeve placements, as well as hood and pocket areas. Tools like Canva and Gelato offer customizable templates, allowing designers to preview placements before production. By following these guides, creators can adapt logo sizes and positions to complement the hoodie’s design, ensuring a polished and professional finish. This resource is ideal for achieving consistent results across diverse hoodie styles and fits.
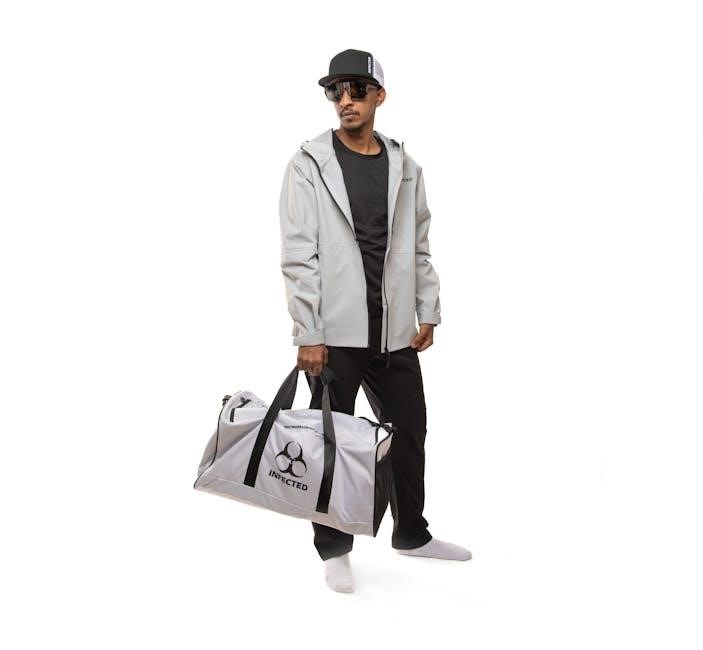
9.3 Real-Life Examples of Successful Placements
Real-life examples showcase how logos are effectively placed on hoodies to maximize visibility and style. For instance, a centered chest logo on a slim-fit hoodie creates a clean, modern look, while a full-back design on an oversized hoodie makes a bold statement. Sleeve placements, such as embroidery on the upper arm, add subtle branding. These examples highlight how different styles and fits influence logo positioning. By studying successful placements, designers can gain inspiration and understand how to balance aesthetics with functionality, ensuring their designs resonate with the target audience and enhance brand recognition effectively. These examples serve as practical benchmarks for achieving professional results.
Mastering hoodie logo placement ensures professional, stylish designs. By following industry standards, measuring precisely, and testing placements, you can create impactful, branded products that stand out effortlessly.
10.1 Recap of Key Placement Strategies
Effective hoodie logo placement involves strategic positioning across key design zones. The chest area, typically 3-4 inches below the collar, is ideal for small to medium logos. The back offers maximum visibility, with logos often placed 8-12 inches wide. Sleeves provide a subtle yet stylish option, while the hood allows for front or back branding. Pocket placement should complement the design without overwhelming it. Using industry-standard measurements and techniques, like the finger-width method, ensures precision. Testing designs on real garments or mannequins is crucial for flawless results. By balancing aesthetics and functionality, these strategies enhance brand visibility and create professional, appealing designs.
10.2 Final Tips for Consistent Results
For consistent hoodie logo placement, always use industry-standard measurements and test designs on real garments or mannequins. Adjust sizes based on hoodie fit and target audience, ensuring logos are proportional. Utilize digital tools like mockup generators for precise visualization. Maintain balance between aesthetics and functionality, avoiding overcrowded designs. Double-check alignment and registration, especially for screen printing and embroidery. Finally, document your process for future projects to ensure repeatability. By following these tips, you’ll achieve professional, polished results that elevate your brand’s visibility and appeal.