NVK Dog Training Collar Manual: A Comprehensive Guide
Welcome! This detailed manual provides essential guidance for the NVK TC-16/TC-20 training collar, ensuring safe and effective pet behavior modification techniques.
Understanding Your NVK Training Collar
The NVK dog training collar is a versatile tool designed to help you communicate more effectively with your canine companion. It utilizes three primary training modes – static stimulation, vibration, and tone – to address a wide range of behavioral issues. This collar isn’t about punishment; it’s about providing clear, consistent signals your dog can understand, ultimately fostering a stronger bond and improved obedience.
Before use, familiarize yourself with each mode and its appropriate application. The static stimulation offers varying levels of intensity, while vibration provides a gentle nudge. The tone mode serves as an auditory cue. Successful training relies on understanding your dog’s temperament and responding accordingly. Remember to always prioritize positive reinforcement alongside collar use for optimal results and a happy, well-behaved pet.
Key Features of the NVK TC-16/TC-20
The NVK TC-16 and TC-20 training collars boast several key features designed for effective and humane dog training. Both models offer adjustable stimulation levels – up to 100 – catering to various dog sizes and temperaments. A user-friendly remote transmitter allows for easy control of the training modes: static, vibration, and tone. The collars are designed for multiple dogs, supporting the addition of receiver collars (sold separately) paired to a single remote.
Furthermore, these collars feature a safety lock function to prevent accidental stimulation. They are also constructed with durable, waterproof materials, ensuring reliability in various weather conditions. The long-range capability provides flexibility during training sessions, and the clear LCD screen displays the selected stimulation level. These features combine to create a powerful and adaptable training solution.
Package Contents & Initial Inspection
Upon receiving your NVK TC-16/TC-20 Dog Training Collar, carefully inspect the package contents. You should find one remote transmitter, one receiver collar, a USB charging cable, and a user manual. Additionally, the package includes test light and contact points of varying lengths to accommodate different coat types.
Thoroughly examine all components for any signs of damage during shipping. Verify that the remote transmitter powers on and the receiver collar responds. Ensure the charging ports are intact and free from debris. If any items are missing or damaged, immediately contact NVK customer support for assistance. Before initial use, fully charge both the remote and receiver collar to ensure optimal performance. Retain the original packaging for potential returns or warranty claims.
Setting Up Your Collar
Preparation is key! This section details the crucial steps for charging both the remote transmitter and receiver collar, alongside the pairing process.
Charging the Remote Transmitter
Ensuring Power for Effective Training: To charge the remote transmitter, locate the designated charging port, typically a USB-C or micro-USB connection. Connect the provided charging cable to the port and a suitable power source, such as a USB wall adapter or a computer. During charging, a visual indicator, often an LED light, will illuminate to signify the charging process is underway.
Allow approximately 2-3 hours for a full charge. Avoid overcharging, as this could potentially reduce the lifespan of the battery. A fully charged remote transmitter will provide several days of typical use, depending on the frequency of stimulation and mode usage. It’s recommended to fully charge the remote before initial use and periodically to maintain optimal performance. Disconnect the charging cable once the charging indicator signals a full charge.
Charging the Receiver Collar
Maintaining Receiver Power: The receiver collar requires regular charging to ensure consistent functionality during training sessions. Locate the charging port on the receiver, usually protected by a rubber cover. Connect the provided charging cable – often a specific type for waterproof collars – to the port and a USB power source. A red or amber LED indicator will typically illuminate during the charging process.
Allow approximately 2-3 hours for a complete charge. Avoid prolonged overcharging to preserve battery health. A fully charged receiver collar generally provides 6-8 hours of continuous use, depending on the stimulation level and frequency. Always ensure the charging port cover is securely sealed after charging to maintain the collar’s waterproof capabilities. Regularly check the battery level before each training session.
Pairing the Remote and Receiver
Establishing Communication: Successful pairing between the remote transmitter and receiver collar is crucial for operation. Begin by ensuring both devices are powered on. Typically, the pairing process involves pressing a specific pairing button on both the remote and the receiver simultaneously. Consult your NVK TC-16/TC-20 manual for the exact button locations, as they may vary slightly.
Hold the buttons until the receiver emits a beep or a light flashes, indicating it’s in pairing mode. The remote will also display a confirmation signal. If successful, the receiver collar will beep and the green light will flash slowly. This process is essential for adding additional receiver collars to a single remote. Refer to the manual for detailed illustrations and troubleshooting steps if pairing fails.
Using the Training Modes
Explore Versatility: The NVK collar offers static stimulation, vibration, and tone modes, allowing customized training approaches tailored to your dog’s temperament and needs.
Static Stimulation Level Adjustment
Precise Control is Key: The NVK training collar features adjustable static stimulation levels, ranging from 1 to 100, enabling you to find the lowest effective setting for your dog. Begin always at the lowest level and incrementally increase it until you observe a clear, but not excessive, response from your pet.
Observe Your Dog: Watch for subtle cues like an ear twitch, head turn, or change in pace – these indicate the stimulation is being noticed. Avoid levels that cause vocalization, distress, or prolonged reaction. Remember, the goal isn’t punishment, but communication.
Consistency Matters: Maintain consistent levels for specific behaviors to avoid confusion. Document the levels that work best for different situations to optimize your training sessions. Prioritize positive reinforcement alongside static stimulation for optimal results.
Vibration Mode Explained
A Gentle Nudge: The vibration mode on your NVK collar offers a non-shock alternative for gaining your dog’s attention or interrupting unwanted behaviors. It delivers a buzzing sensation, acting as a subtle cue without causing discomfort or fear. This is particularly useful for dogs sensitive to static stimulation or for reinforcing already-learned commands.
Versatile Application: Utilize vibration to redirect attention during walks, discourage nuisance barking, or signal recall. Like static levels, vibration intensity is adjustable – start low and increase gradually until a noticeable response is achieved.
Pair with Positive Reinforcement: Always follow a vibration cue with a verbal command and reward when your dog responds appropriately, solidifying the association and promoting positive learning.
Tone Mode Functionality
Auditory Cue for Training: The tone mode on your NVK training collar emits a distinct audible sound, serving as a unique command or attention-getter for your dog. It’s a completely separate signal from vibration or static stimulation, offering another communication channel;
Conditioning the Response: Initially, pair the tone with a known command and reward your dog when they respond. This establishes the tone as a signal for a specific action. The tone’s volume isn’t adjustable, but its novelty can be highly effective.
Versatile Use Cases: Employ the tone for recall, distraction-breaking, or as a marker signal during trick training. Consistent use will help your dog quickly recognize and respond to this auditory cue.
Proper Collar Fitting & Placement
Optimal Comfort & Effectiveness: Correct collar fit is crucial for both your dog’s comfort and the training collar’s effectiveness, ensuring safe and humane use.
Ensuring a Secure and Comfortable Fit
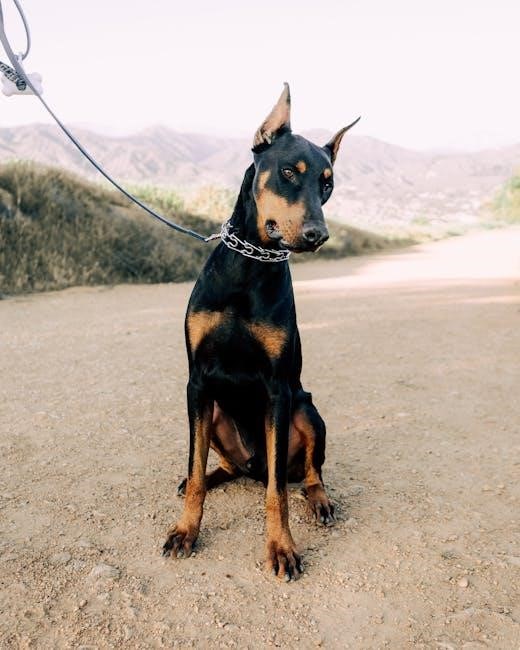
Achieving the Right Fit: Begin by sliding the receiver collar onto your dog, ensuring it rests snugly against their skin, but not too tightly. You should be able to comfortably slide two fingers between the collar and your dog’s neck. A loose fit can cause the contact points to slip and deliver inconsistent stimulation, hindering the training process. Conversely, an overly tight fit can cause discomfort or even injury, defeating the purpose of positive reinforcement.
Adjusting the Collar: Utilize the adjustable strap to fine-tune the fit. Regularly check the fit, especially during active training sessions, as your dog’s movements can cause the collar to shift. Remember, the goal is a secure, comfortable fit that maintains consistent contact with the skin without causing any pressure sores or irritation. Prioritize your dog’s well-being throughout the fitting process.
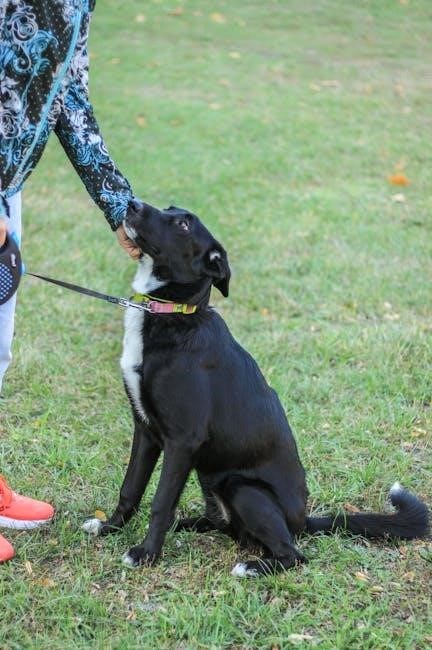
Correct Collar Positioning on Your Dog
Optimal Placement is Key: For effective and humane training, proper collar positioning is crucial. The receiver collar should be positioned high on your dog’s neck, directly behind their ears. This placement ensures the contact points consistently touch the skin and delivers stimulation as intended. Avoid placing the collar too low, as it may slide around or be less effective.
Contact Point Orientation: Ensure the metal contact points are facing inward, making direct contact with your dog’s skin. They should not be touching the fur, as fur can insulate against the stimulation. Regularly inspect the contact points for any signs of irritation or redness on your dog’s skin. Adjust the collar or discontinue use if irritation occurs. Proper positioning maximizes training effectiveness and minimizes discomfort.
Training Techniques & Best Practices
Effective Training: Combine the NVK collar with positive reinforcement, clear commands, and consistent repetition for optimal results and a happy, well-behaved companion.
Positive Reinforcement Methods
Rewarding Good Behavior: Positive reinforcement is crucial when utilizing the NVK training collar. Focus on rewarding desired behaviors immediately after they occur, using treats, praise, or toys. This helps your dog associate positive experiences with obedience, strengthening the training process. Avoid punishment-based methods, as they can create fear and anxiety, hindering progress.
Timing is Key: Deliver rewards within seconds of the desired action to establish a clear connection. Consistency is also vital; reward the same behavior every time initially, then gradually transition to intermittent reinforcement. This maintains engagement and prevents your dog from becoming reliant on constant rewards. Remember, the collar is a tool to guide behavior, not to punish. Pair its use with enthusiastic praise and tangible rewards for the best outcomes.
Introducing the Collar to Your Dog
Gradual Acclimation: Begin by letting your dog simply wear the receiver collar for short periods, without any stimulation. Pair this with positive experiences like feeding or playtime, so the collar becomes associated with good things. Gradually increase the wearing time over several days, monitoring for any signs of discomfort or distress.
Familiarization with the Remote: Allow your dog to investigate the remote transmitter, sniffing it and becoming accustomed to its presence. Avoid sudden movements or startling your dog with the device. The goal is to create a neutral association with both the collar and the remote. Never introduce stimulation before your dog is comfortable wearing the collar. Patience is key to a stress-free introduction!
Effective Command Association
Timing is Crucial: Consistently pair the collar’s stimulation (static, vibration, or tone) immediately with your chosen verbal command. For example, say “Stay” and then apply a low-level stimulation if your dog begins to move. Release the stimulation the instant your dog complies. This creates a clear link between the command, the sensation, and the desired behavior.
Positive Reinforcement: Always follow successful command execution with enthusiastic praise and a reward. This reinforces the positive association and motivates your dog to repeat the behavior. Avoid using the collar for punishment; it’s a communication tool, not a disciplinary measure. Consistent, clear commands and positive reinforcement are vital for effective training.
Troubleshooting Common Issues
Facing difficulties? This section offers solutions for typical problems, including a collar that won’t power on, pairing failures, and low battery warnings.
Collar Not Turning On
If your receiver collar isn’t responding, begin by verifying the power switch is firmly in the ‘On’ position. A common issue is simply a depleted battery; connect the receiver to the provided charging cable and allow it to charge for the recommended duration, typically several hours. Ensure the charging cable is securely connected to both the collar and a functioning power source.
Next, check the remote transmitter’s battery level as a low remote battery can sometimes interfere with the receiver’s operation. If the receiver still fails to power on after a full charge, attempt a reset by briefly pressing and releasing the power button multiple times. If problems persist, consult the full NVK Dog Training Collar Manual for detailed diagrams and further troubleshooting steps, or contact NVK customer support for assistance.
Pairing Problems & Solutions
Experiencing difficulty pairing the remote and receiver? First, ensure both devices are within close proximity – ideally, no more than a few feet apart. Initiate the pairing process as described in the manual: typically, this involves pressing a pairing button on both the remote and the receiver simultaneously. Observe the indicator lights; a successful pairing is usually signaled by a beep from the receiver and a slowly flashing green light.
If pairing fails, try resetting both devices. Power cycle the remote and receiver, then repeat the pairing procedure. Interference from other electronic devices can sometimes disrupt the signal; move to a different location and retry. Refer to the NVK Dog Training Collar Manual for specific button locations and detailed illustrations. If issues continue, contact NVK support for further guidance.
Low Battery Indicators & Replacement
Recognizing low battery levels is crucial for uninterrupted training. Both the remote transmitter and receiver collar feature indicators – typically, a flashing red light or a series of beeps – to signal low power. When you observe these indicators, promptly recharge the devices using the provided charging cable.
For the remote, connect it to a USB power source. The receiver collar also utilizes a USB charging port. Allow several hours for a full charge. Do not use fast chargers, as they may damage the battery. Always refer to the NVK Dog Training Collar Manual for specific charging times and voltage requirements. Ensure the charging port is clean and free of debris before connecting.
Safety Precautions & Warnings
Prioritize your dog’s well-being! Always use the lowest effective stimulation level and avoid prolonged or excessive corrections during training sessions.
Important Safety Guidelines
Read carefully before use! The NVK training collar is a powerful tool, and responsible operation is crucial for your dog’s safety and well-being. Never use the collar on puppies under six months old, or dogs with aggressive tendencies without professional guidance. Always begin with the lowest stimulation level and gradually increase it only if necessary to achieve a response.
Avoid leaving the collar on for extended periods – a maximum of 12 hours per day is recommended. Regularly inspect the collar for any signs of skin irritation or discomfort; Discontinue use immediately if irritation occurs. Never use the collar as punishment, but rather as a communication tool during training. Misuse can lead to anxiety, fear, or aggression. Supervise your dog closely during initial training sessions and always prioritize positive reinforcement methods alongside the collar’s use.
Avoiding Misuse and Potential Harm
Prioritize your dog’s welfare! Incorrect application of the NVK collar can cause undue stress or even physical harm. Never increase the stimulation level to the point where your dog exhibits signs of pain, vocalization, or panic. Avoid using the collar for prolonged periods, as this can lead to psychological distress.
Do not attempt to correct all behavioral issues with the collar alone; integrate positive reinforcement techniques for optimal results. Refrain from using the collar on dogs with pre-existing medical conditions without veterinary approval. Improper fitting can cause skin irritation, so ensure a snug but comfortable fit. Remember, the collar is a training aid, not a quick fix. Consistent, patient, and ethical training practices are essential for a happy and well-behaved companion.
NVK Collar Manual PDF Download & Resources
Access comprehensive support! For a detailed, downloadable version of the NVK TC-16/TC-20 dog training collar manual, please visit the official NVK website. This PDF resource contains expanded explanations, illustrative diagrams, and troubleshooting guides to enhance your understanding.
Additional resources, including frequently asked questions (FAQs) and video tutorials, are also available online to assist you with setup, training, and maintenance. Customer support can be reached via email or phone for personalized assistance; Explore online forums and communities dedicated to NVK products to connect with other users and share experiences. Remember to always refer to the official documentation for the most accurate and up-to-date information regarding your NVK training collar.