Singer One Sewing Machine: A Comprehensive User Manual Plan
This manual details the Singer One, offering free digital access to instructions and parts lists from sources like Pocono Sew-Vac.
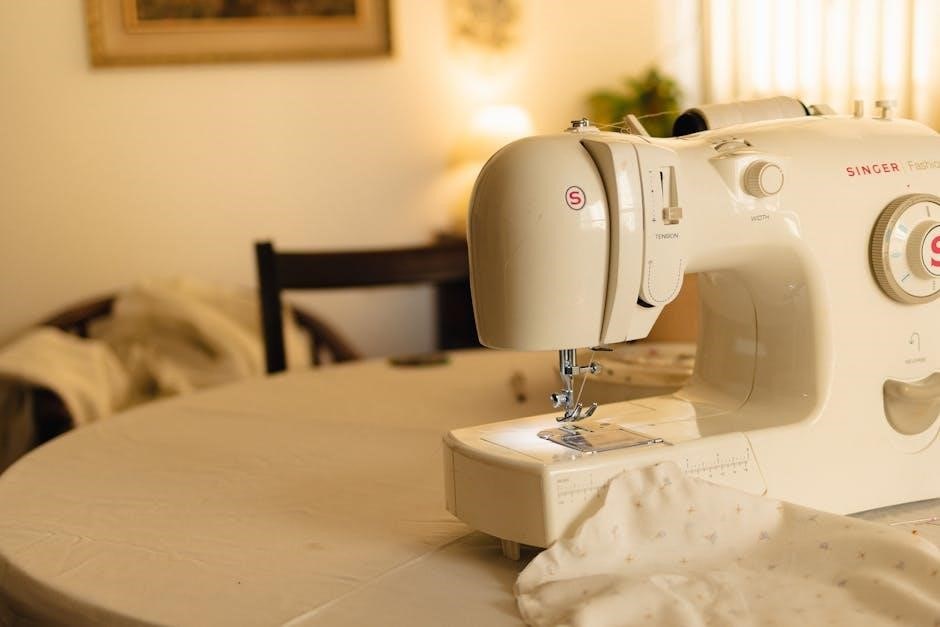
The Singer One sewing machine represents a modern approach to a classic craft, designed for both beginners and experienced sewists. This manual serves as a comprehensive guide to unlock its full potential. Access to free digital manuals, readily available online through retailers like Pocono Sew-Vac, ensures users have immediate support.
Understanding the Singer One’s capabilities begins with familiarizing yourself with its features and functions. This includes navigating the available resources, such as downloadable instruction manuals in PDF format, alongside parts lists and accessory information. The Singer 1100/1120 manual, often found as a related resource, can provide supplementary insights.
This guide will walk you through everything from initial setup to advanced techniques, empowering you to create a wide range of sewing projects with confidence and ease.
II. Unboxing and Initial Setup
Upon receiving your Singer One, carefully inspect the box for any signs of damage during shipping. Once opened, verify that all included components are present, referencing the parts list within the digital manual available from sources like Pocono Sew-Vac.
Initial setup involves removing all packaging materials and placing the machine on a stable, well-lit surface. Before plugging in the power cord, ensure the voltage selector switch (if applicable) is set to the correct voltage for your region.
Consult the instruction manual (PDF format readily downloadable) for specific guidance on attaching the power cord and preparing the machine for its first use. Familiarize yourself with the basic controls before proceeding.
III. Machine Components Overview
The Singer One boasts a user-friendly design, with key components clearly identified in the downloadable instruction manual. These manuals, available digitally (like those from Pocono Sew-Vac), detail each part’s function.
Essential elements include the power switch, handwheel, needle clamp, presser foot, and feed dogs. Understanding the bobbin winder, tension dials, and stitch selection controls is crucial for operation.
The control panel, explained in the manual, features intuitive buttons and dials for adjusting stitch length, width, and pattern selection. Familiarizing yourself with these components before sewing will enhance your experience and ensure proper machine function.
A. Identifying Key Parts
The Singer One instruction manual meticulously details each component, starting with the power switch and handwheel – essential for manual control. It highlights the needle clamp, securing the needle, and the presser foot, applying pressure during stitching.
Crucially, the manual identifies the feed dogs, responsible for fabric movement, and the bobbin winder, vital for preparing the bobbin. Understanding the tension discs and their role in thread control is also emphasized.
Locating the stitch length dial and stitch width slider, as shown in the manual, allows for customized stitch creation. Proper identification of these parts, guided by the digital resources, ensures smooth operation.
B. Understanding the Control Panel
The Singer One’s control panel, as illustrated in the instruction manual, features intuitive stitch selection buttons. These buttons correspond to the built-in stitch patterns, offering versatility for various projects.
The manual clarifies the function of the speed control slider, allowing users to adjust sewing speed for precision or efficiency. Understanding the reverse stitch button is crucial for securing seams.
Digital manuals from Pocono Sew-Vac highlight the needle position button, enabling precise starting and ending points. The light switch, often overlooked, is also detailed for optimal visibility. Familiarizing yourself with these controls, guided by the manual, unlocks the machine’s full potential.
IV. Getting Started: Basic Operation
The Singer One instruction manual prioritizes a smooth start for beginners; It begins with detailed guidance on winding the bobbin, a foundational step for successful sewing.
Clear diagrams illustrate proper upper threading techniques, emphasizing correct thread path and tension. Equally important is the bobbin threading process, explained step-by-step to prevent jams.
Pocono Sew-Vac’s digital manuals reinforce these steps, offering visual aids. Mastering these initial operations, as outlined in the manual, is essential before attempting any sewing project. The manual stresses the importance of correct threading for optimal stitch quality and machine performance.
A. Winding the Bobbin
The Singer One instruction manual dedicates specific attention to bobbin winding, recognizing it as a crucial first step. It details placing the thread spool correctly on the spool pin and guiding it through the thread guides.
The manual illustrates how to properly position the bobbin onto the bobbin winder spindle, ensuring it clicks securely into place. It emphasizes the importance of engaging the bobbin winder mechanism and starting the machine at a slow, consistent speed.
Digital manuals from Pocono Sew-Vac visually demonstrate this process. The manual advises monitoring the bobbin as it fills, stopping before overfilling to prevent thread tangles and ensure even winding.
B. Threading the Machine (Upper Thread)
The Singer One’s instruction manual provides a clear, step-by-step guide to upper threading, vital for proper stitch formation. It begins with spool placement and thread passage through the first thread guide, emphasizing correct direction.
Detailed illustrations show navigating the thread through the tension discs, ensuring consistent thread tension. The manual highlights the importance of correctly threading the take-up lever, a common point of error.
Pocono Sew-Vac’s digital resources visually reinforce these steps. It continues with guiding the thread through the needle clamp and finally, threading the needle eye from front to back.
C. Threading the Machine (Bobbin Thread)
The Singer One instruction manual details bobbin threading, crucial for interlocking stitches. It begins by confirming the bobbin is correctly wound and inserted into the bobbin case, noting the rotation direction.
The manual illustrates guiding the thread through the tension spring of the bobbin case, ensuring smooth thread release. It emphasizes holding the bobbin thread taut while inserting the bobbin case into the machine.
Resources from Pocono Sew-Vac visually demonstrate this process. The final step involves drawing up the bobbin thread through the needle plate, ready for sewing.
V. Stitch Selection and Adjustment
The Singer One instruction manual comprehensively covers stitch selection, a core function of the machine. It details accessing the built-in stitch patterns via the control panel, explaining each stitch’s purpose – from straight stitching for seams to zigzag for finishing edges.
Adjustment of stitch length and width is also explained, allowing users to customize stitches for different fabrics and projects. The manual emphasizes testing stitch settings on scrap fabric before starting a project.
Tension adjustment is crucial for balanced stitches; the manual provides guidance on recognizing tension issues and making necessary adjustments.
A. Built-in Stitch Patterns
The Singer One sewing machine boasts a variety of built-in stitch patterns, detailed within its instruction manual. These patterns cater to diverse sewing needs, extending beyond basic straight and zigzag stitches.
The manual illustrates each stitch, clarifying its ideal application – whether for decorative purposes, stretch fabrics, or reinforcing seams. Users will find patterns for buttonholes, blind hems, and various decorative embellishments.

Clear diagrams and explanations guide users in selecting the appropriate stitch for their project, ensuring optimal results. The manual also highlights how to modify stitch settings for personalized effects.
B. Stitch Length and Width Control
The Singer One instruction manual provides detailed guidance on adjusting stitch length and width, crucial for achieving desired sewing outcomes. These controls directly impact the appearance and strength of your seams.
The manual explains how varying stitch length affects fabric gathering, seam durability, and overall aesthetic. Shorter stitches are recommended for delicate fabrics and curves, while longer stitches suit heavier materials.
Similarly, width adjustments influence the breadth of zigzag stitches and decorative patterns. The manual illustrates how to experiment with these settings to create unique designs and secure edges effectively.
C; Tension Adjustment
The Singer One instruction manual emphasizes the importance of proper tension adjustment for balanced and professional-looking stitches. Incorrect tension leads to looping, puckering, or weak seams, compromising the project’s integrity.
The manual details how to identify tension problems – whether the upper thread pulls the bobbin thread to the fabric’s underside or vice versa; It provides a step-by-step guide to adjusting the tension dial, explaining how small increments can make a significant difference.
Furthermore, the manual clarifies that optimal tension varies based on fabric type, thread weight, and stitch selection. It encourages users to test adjustments on scrap fabric before starting their actual project.
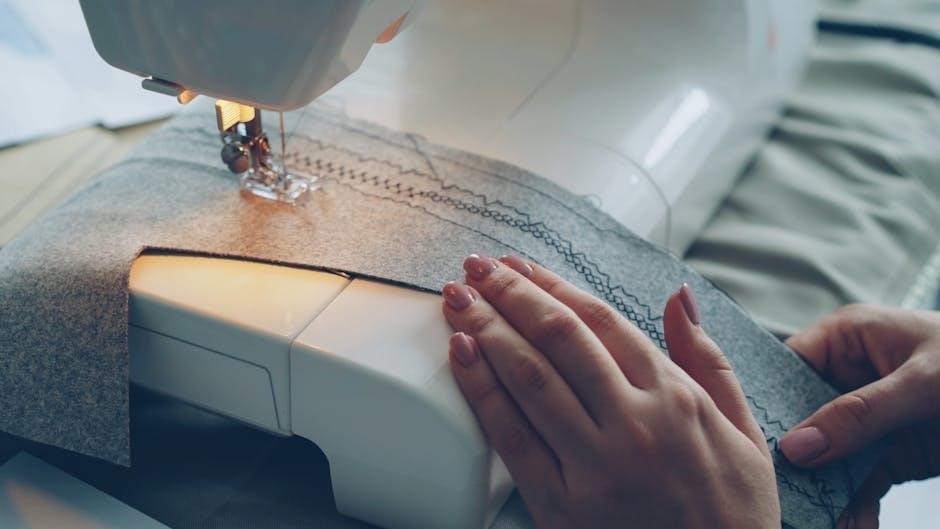
VI. Basic Sewing Techniques
The Singer One instruction manual provides a foundational guide to essential sewing techniques, empowering beginners and refreshing skills for experienced sewers. It begins with detailed instructions for straight stitching, emphasizing consistent speed and guiding fabric evenly.
Next, the manual explains zigzag stitching, highlighting its versatility for finishing raw edges, creating decorative elements, and sewing stretch fabrics. Clear diagrams illustrate stitch width adjustments for varied effects.
Crucially, the manual dedicates a section to backstitching, demonstrating how to secure seams at the beginning and end of a stitch line, preventing unraveling and ensuring durability.
A. Straight Stitching
The Singer One instruction manual emphasizes straight stitching as the cornerstone of sewing, providing detailed guidance for achieving neat, consistent results. It instructs users to select the appropriate straight stitch setting on the control panel, typically the default option.
The manual stresses the importance of guiding the fabric smoothly under the presser foot, maintaining a consistent seam allowance as indicated by markings on the needle plate.
Beginners are advised to practice on scrap fabric before tackling a project, focusing on maintaining a steady sewing speed and straight line. The manual also covers troubleshooting common issues like uneven stitches, often linked to fabric handling.
B. Zigzag Stitching
The Singer One instruction manual details zigzag stitching as a versatile technique, ideal for finishing raw edges, creating decorative elements, and sewing stretch fabrics. Users are guided to select the zigzag stitch pattern on the machine’s control panel, adjusting the stitch width and length according to the project’s needs.
The manual highlights the importance of testing stitch settings on scrap fabric to ensure proper coverage and prevent puckering. It explains how wider zigzag stitches are suitable for preventing fabric fraying, while narrower stitches are better for appliqué.
Troubleshooting tips address issues like uneven zigzag lines, often caused by incorrect tension or improper fabric feeding, offering solutions for achieving professional-looking results.
C. Backstitching
The Singer One instruction manual emphasizes backstitching as a crucial technique for securing seams at the beginning and end of a sewing line. It details how to engage the backstitch lever or button, instructing users to sew a short distance forward, then backward over the initial stitches.
The manual clarifies the importance of consistent backstitching length – typically a few stitches – to ensure a strong and durable seam. It advises against excessively long backstitches, which can weaken the fabric.
Troubleshooting guidance addresses issues like puckering or bunching caused by improper backstitching technique, recommending adjustments to stitch length and tension. The manual stresses the role of backstitching in preventing unraveling and enhancing seam integrity.
VII. Advanced Sewing Techniques
The Singer One manual progresses to advanced techniques, building upon foundational skills. It details buttonhole creation, guiding users through selecting the appropriate buttonhole foot and stitch settings for various button sizes.
Zipper insertion instructions cover several methods, including centered, overlapped, and invisible zippers, with clear diagrams illustrating each step. The manual emphasizes the importance of using a zipper foot for precise stitching close to the zipper teeth.
Regarding overlock stitching, the manual clarifies if the Singer One model supports this feature, and if so, provides detailed instructions on utilizing the overlock stitch for finishing raw edges and creating professional-looking seams. It also offers tips for achieving a clean and even overlock finish.
A. Buttonhole Sewing
The Singer One instruction manual dedicates a section to mastering buttonholes, a frequently requested advanced technique. It begins by identifying the correct buttonhole foot for your machine, crucial for achieving clean, consistent results. The manual details selecting the appropriate buttonhole stitch setting, often with pre-programmed options for different button sizes.

Step-by-step illustrations guide users through the process, emphasizing accurate button placement and consistent fabric feeding. It explains how to properly stabilize the fabric to prevent puckering and ensure a professional finish. The manual also covers adjusting buttonhole length and density for varied effects.
Finally, it provides guidance on securing the buttonhole ends and attaching the button itself, completing the process with a durable and aesthetically pleasing result.
B. Zipper Insertion
The Singer One instruction manual provides detailed guidance on inserting various zipper types – standard, invisible, and decorative. It begins by selecting the appropriate zipper foot, designed to sew close to the zipper teeth for a professional finish. The manual illustrates preparing the fabric seam where the zipper will be inserted, emphasizing accurate marking and pinning.
Step-by-step diagrams demonstrate attaching the zipper to the fabric, covering both centered and lapped zipper applications. It highlights maintaining consistent seam allowance and avoiding skipped stitches. The manual also explains techniques for handling zipper ends and creating neat, secure closures.
Troubleshooting tips address common issues like uneven zipper insertion or puckering, ensuring a smooth and successful outcome.
C. Overlock Stitching (if applicable)
The Singer One manual’s coverage of overlock stitching depends on the specific model’s capabilities. If equipped, the manual details selecting the overlock stitch, often a zigzag variation designed to encase raw fabric edges. It explains the importance of using the correct presser foot – typically an overlock or zigzag foot – for optimal results.
Instructions guide users through adjusting stitch width and length to achieve a secure and neat overlocked edge, preventing fraying. Diagrams illustrate feeding the fabric evenly to create a consistent stitch. The manual emphasizes practicing on scrap fabric to master the technique.
Troubleshooting addresses issues like uneven overlocking or thread bunching, ensuring a professional finish on projects.
VIII. Troubleshooting Common Issues
The Singer One instruction manual dedicates a section to resolving frequent sewing problems. It addresses thread breakage, detailing causes like incorrect threading, needle issues, or excessive tension. Solutions include re-threading, replacing the needle, and adjusting tension settings.
Needle breakage is covered, pinpointing potential culprits such as using the wrong needle type for the fabric, forcing the fabric, or a bent needle. The manual stresses using appropriate needles and avoiding excessive force.
Tension problems receive detailed attention, explaining how to identify and correct imbalances. Diagrams illustrate adjusting the upper and bobbin tension for balanced stitches, preventing looping or puckering.
A. Thread Breakage Problems
The Singer One manual identifies several causes for thread breakage during operation. Incorrect threading of the upper thread or bobbin is a primary suspect, requiring careful review of the threading diagrams. Using a dull or damaged needle significantly increases the risk, necessitating frequent needle replacements.
Excessive tension is highlighted as a common contributor; the manual instructs users to reduce upper tension settings. Poor quality thread can also break easily, recommending reputable brands. Finally, attempting to sew through overly thick or multiple fabric layers can strain the thread, leading to breakage.
B. Needle Breakage Problems
The Singer One instruction manual addresses needle breakage as a frequent user concern. A primary cause is bending the needle when attempting to sew over pins; always remove pins before the needle reaches them. Using the incorrect needle type for the fabric weight is also critical – lighter fabrics require finer needles.
Incorrect needle insertion is another frequent issue; ensure the needle is fully inserted and facing the correct direction. Excessive fabric thickness or pulling the fabric while sewing can strain the needle, leading to breakage. Finally, a damaged or dull needle is prone to snapping, requiring immediate replacement.
C. Tension Issues and Solutions
The Singer One instruction manual dedicates significant attention to tension problems, a common sewing frustration. Incorrect threading of the upper or bobbin thread is often the culprit; re-thread both, ensuring proper path adherence. Tension settings must match the fabric type – lighter fabrics need looser tension, heavier fabrics tighter.
Bobbin issues, like improper bobbin winding or using an incompatible bobbin, also cause tension imbalances. Regularly clean the bobbin case to remove lint and debris. If problems persist, consult the manual’s tension adjustment guide, making small adjustments until balanced stitches are achieved.
IX. Maintenance and Cleaning
The Singer One instruction manual emphasizes regular maintenance for optimal performance and longevity. Frequent cleaning prevents lint and dust buildup, which can cause malfunctions. Power off and unplug the machine before any cleaning procedure. Use a soft brush to remove debris from the bobbin area, feed dogs, and around the needle plate.
Lubrication is crucial, but only apply sewing machine oil to designated points as outlined in the manual. Avoid over-oiling. Regularly inspect and replace the needle, as a dull or damaged needle impacts stitch quality. Proper care, guided by the manual, ensures years of reliable sewing.
A. Regular Cleaning Procedures
The Singer One instruction manual stresses consistent cleaning to maintain peak performance. Begin by disconnecting the power cord. Utilize a soft brush – often included with the machine – to gently remove lint and thread fragments from the bobbin case and surrounding areas. Pay close attention to the feed dogs and needle plate, ensuring they are free of obstructions.
A lint brush or vacuum cleaner with a brush attachment can aid in removing stubborn debris. Avoid using compressed air, as it can push dust further into the machine. Clean the exterior with a damp cloth. Regular cleaning, as detailed in the manual, prevents issues.
B. Lubrication Guidelines
The Singer One instruction manual provides specific lubrication guidance for optimal operation. Generally, the Singer One requires minimal oiling, and over-lubrication can attract lint and cause problems. Only use sewing machine oil – never household oil or grease.
Apply a small drop of oil to the bobbin case hinge and the race, as indicated in the manual’s diagrams. Also, lightly oil the motor shaft if accessible. Avoid oiling the feed dogs or tension discs. Regular cleaning, as previously discussed, often reduces the need for frequent oiling. Consult the manual for precise locations and frequency, ensuring your Singer One remains smoothly functional.
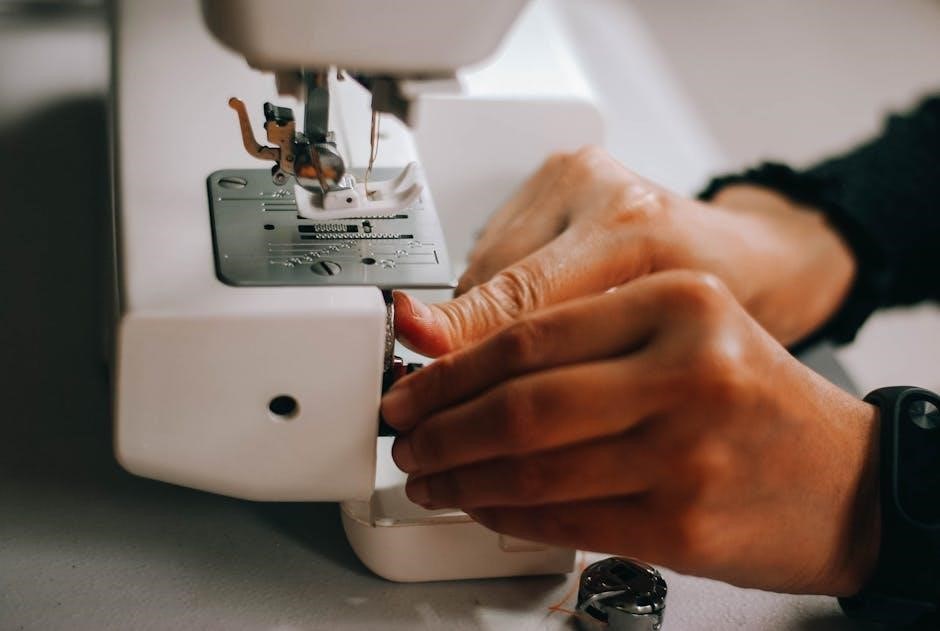
C. Replacing the Needle
The Singer One instruction manual details a straightforward needle replacement process. Always power off and unplug the machine before attempting this. Loosen the needle clamp screw using the appropriate screwdriver – do not remove it completely.
Gently pull the old needle upwards and insert a new needle, ensuring the flat side of the needle faces the back of the machine. Tighten the needle clamp screw securely. Use only needles compatible with the Singer One, as specified in the parts list. A bent or broken needle should be replaced immediately to prevent damage to the machine or injury.
X. Parts and Accessories
The Singer One sewing machine benefits from a range of available parts and accessories, enhancing its versatility. Pocono Sew-Vac lists numerous options, including specialized presser feet for various techniques. Compatible bobbins, needles, and bobbin cases are crucial for optimal performance, and the manual details specific requirements.

Users can find spool pins, caps, and stands to manage thread effectively. Replacement parts, including needles and bobbins, are readily available for purchase. Refer to the Singer One instruction manual for a complete list of compatible accessories and where to source them, ensuring seamless operation and longevity of your machine.
A. Available Presser Feet
The Singer One’s functionality expands significantly with a selection of presser feet, catering to diverse sewing projects. While the base model includes a standard presser foot, numerous specialized options are available through retailers like Pocono Sew-Vac. These feet enable techniques beyond basic stitching, such as zipper insertion, buttonhole creation, and decorative embellishments;
The instruction manual will detail which presser feet are compatible with the Singer One, ensuring proper fit and operation. Investing in the right presser feet unlocks the machine’s full potential, allowing for greater precision and creative freedom. Explore the available options to tailor your sewing experience.
B. Bobbin and Needle Compatibility
Ensuring correct bobbin and needle compatibility is crucial for optimal Singer One performance. The instruction manual will specify the precise bobbin type required – typically a class 15 plastic bobbin – to prevent jamming and maintain consistent stitch quality. Using incompatible bobbins can lead to tension issues and damage the machine.
Similarly, the manual details the appropriate needle sizes and types (e.g., universal, ballpoint, denim) for various fabrics. Selecting the correct needle prevents skipped stitches, fabric puckering, and needle breakage. Pocono Sew-Vac and other retailers offer compatible bobbins and needles, simplifying the selection process. Always refer to the manual for guidance.
C. Where to Purchase Replacement Parts
Maintaining your Singer One requires occasional replacement of parts, and sourcing these correctly is vital. Pocono Sew-Vac is highlighted as a key supplier, offering a comprehensive range of Singer One parts and accessories, including needles, thread, bobbins, presser feet, and bobbin cases. Their website provides easy access to these components.
Additionally, authorized Singer dealers and online retailers specializing in sewing machine parts are viable options. The instruction manual may list preferred suppliers or provide part numbers for easy identification. Always verify compatibility before purchasing, and consider using genuine Singer parts to ensure optimal performance and longevity of your machine.
XI. Safety Precautions
Prioritizing safety when operating the Singer One is paramount. Always disconnect the machine from the power source before threading, changing the needle, or performing any maintenance. Keep fingers away from the needle area during operation to prevent injury. Never sew over pins or thick fabric layers, as this can damage the needle and machine.
Ensure the machine is stable and on a level surface during use. Supervise children and inexperienced users closely. Do not attempt to repair the machine yourself if you are not qualified; seek professional assistance. Always refer to the full instruction manual for detailed safety guidelines and warnings to ensure a safe and enjoyable sewing experience.
XII. Frequently Asked Questions (FAQ)
Q: Where can I find a digital copy of the Singer One instruction manual? A: Pocono Sew-Vac and other online retailers offer free digital downloads. Q: What type of needles are compatible with the Singer One? A: Refer to the parts list in the manual for specific needle types and sizes.
Q: How do I troubleshoot thread breakage? A: Check threading, needle condition, and tension settings. Q: Can I download manuals for similar Singer models, like the 1100/1120? A: Yes, these are often available as PDFs online. Q: Where can I purchase replacement parts? A: Authorized Singer dealers and online parts suppliers are recommended.